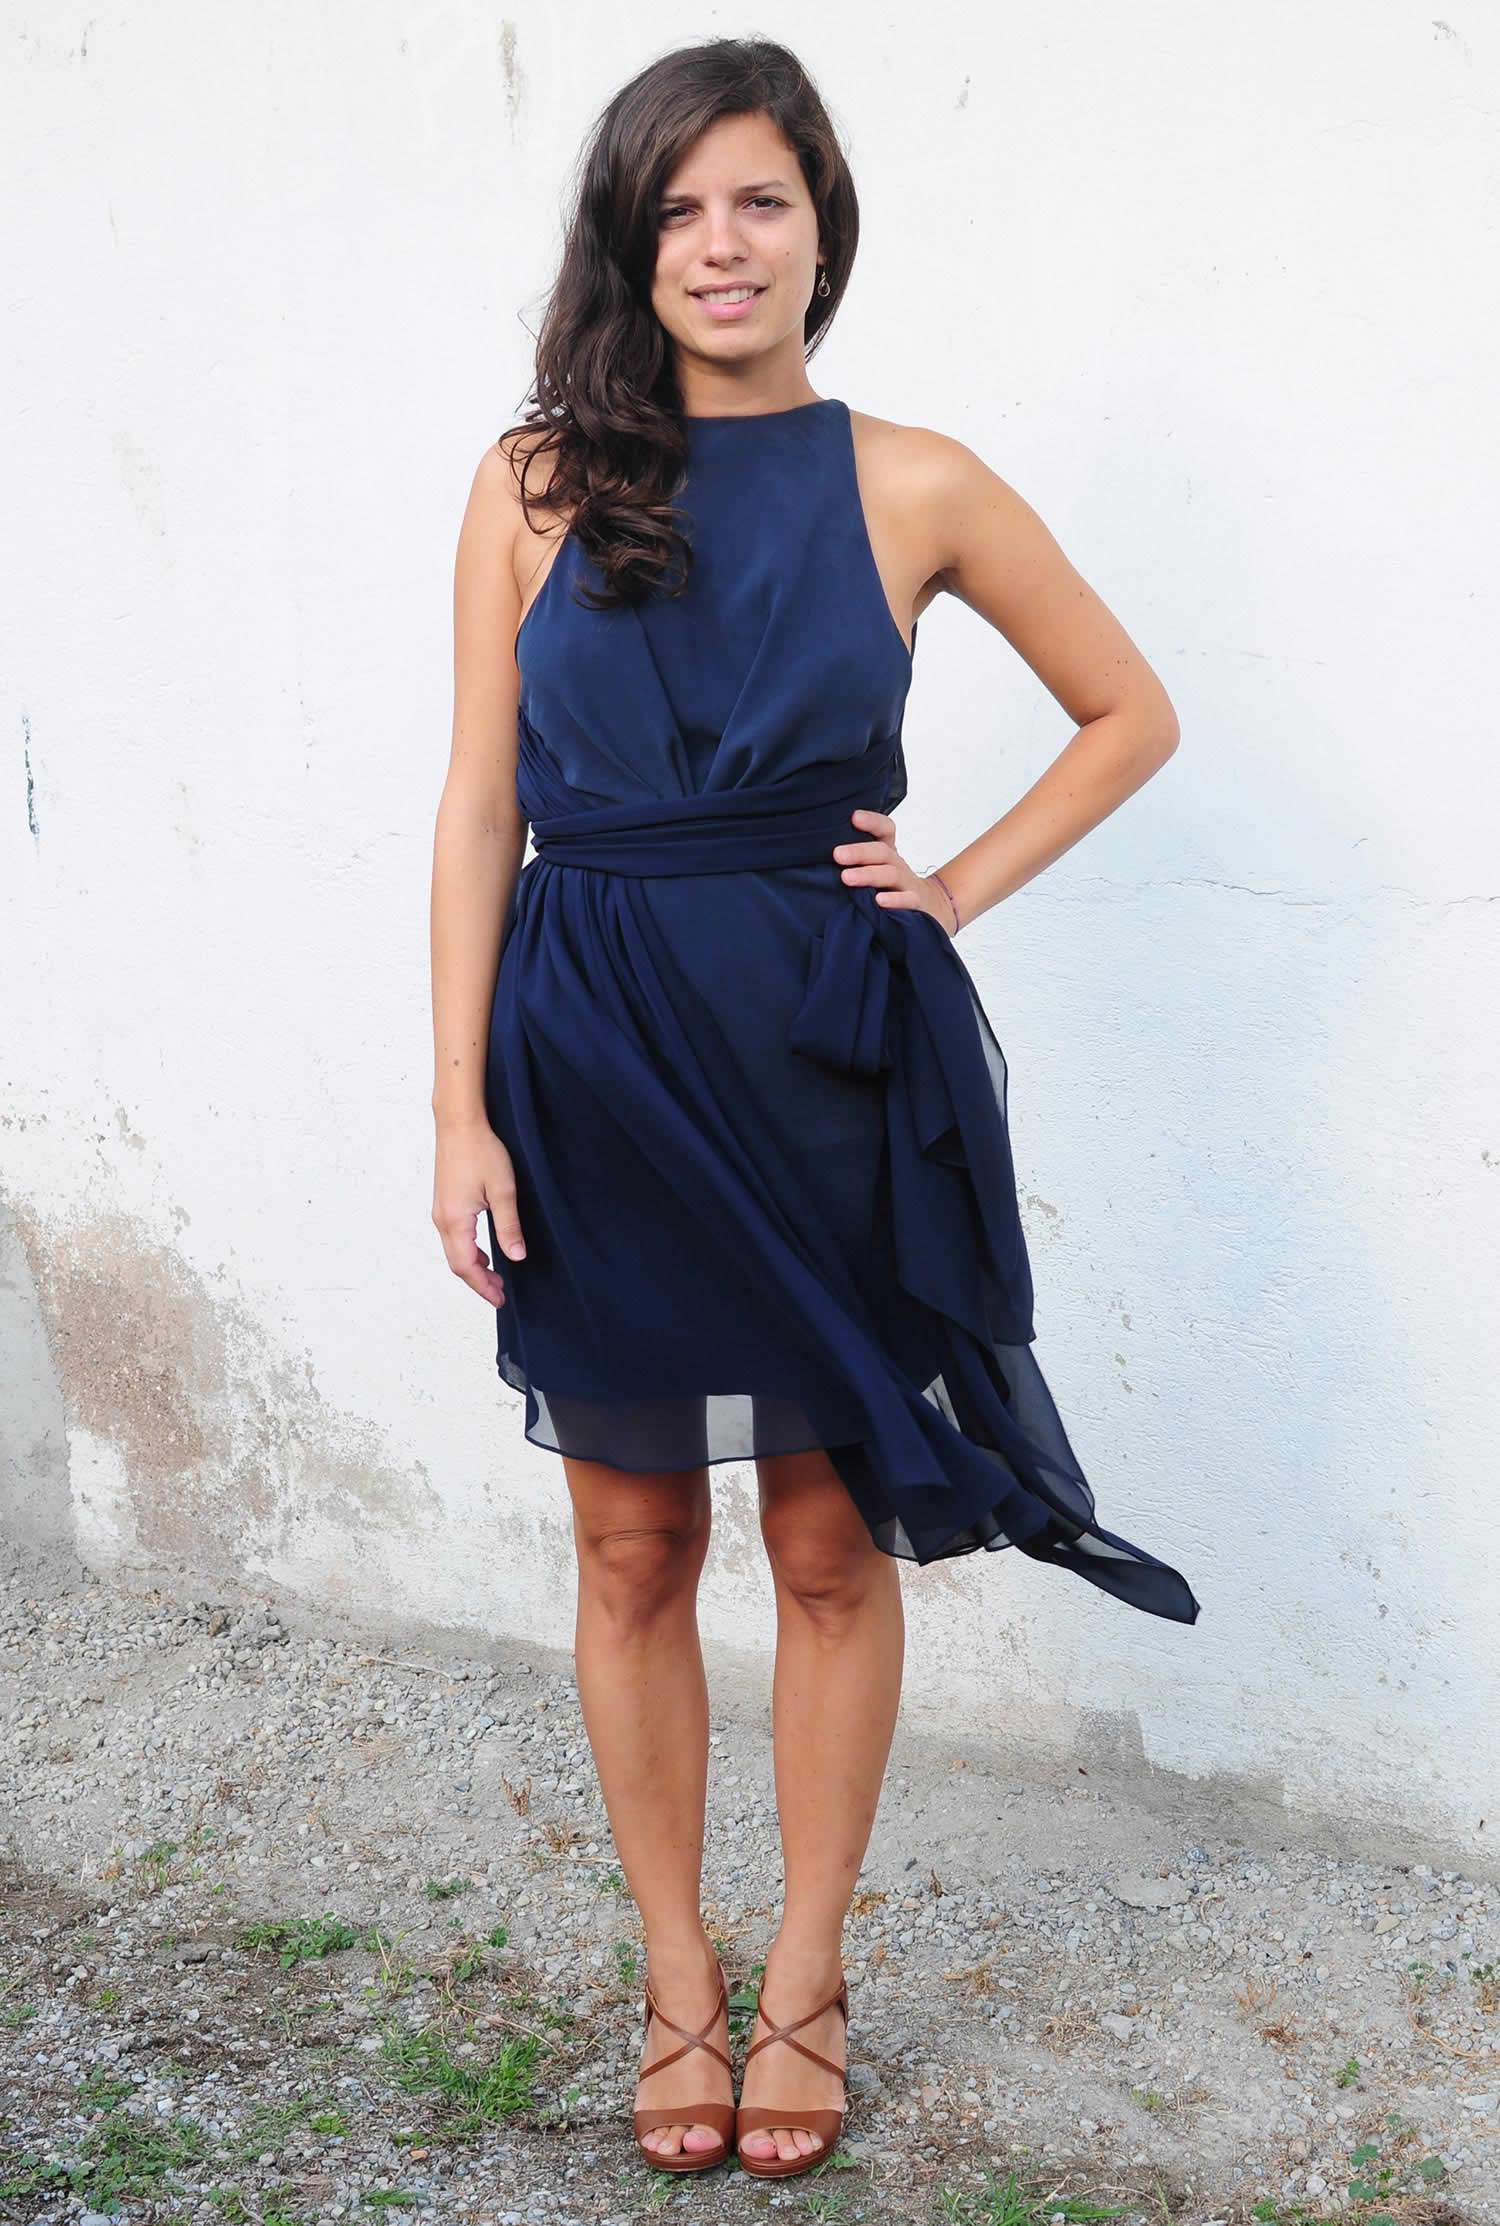
This is a special project I made at school last winter. It’s a draped dress made out of two different silk fabrics in the same shade of navy blue (a matt shantung and a voile), both from my stash.
I made it using the draping technique, so I created the dress draping it on the dress-form. The Pattern Making and Dressmaking course I attended included a Draping on the stand workshop, in which we had to create a dress draping a light cotton cloth on the dress-form. Then, over pattern-making and sewing classes, we had to sew this dress in a fabric we chose.
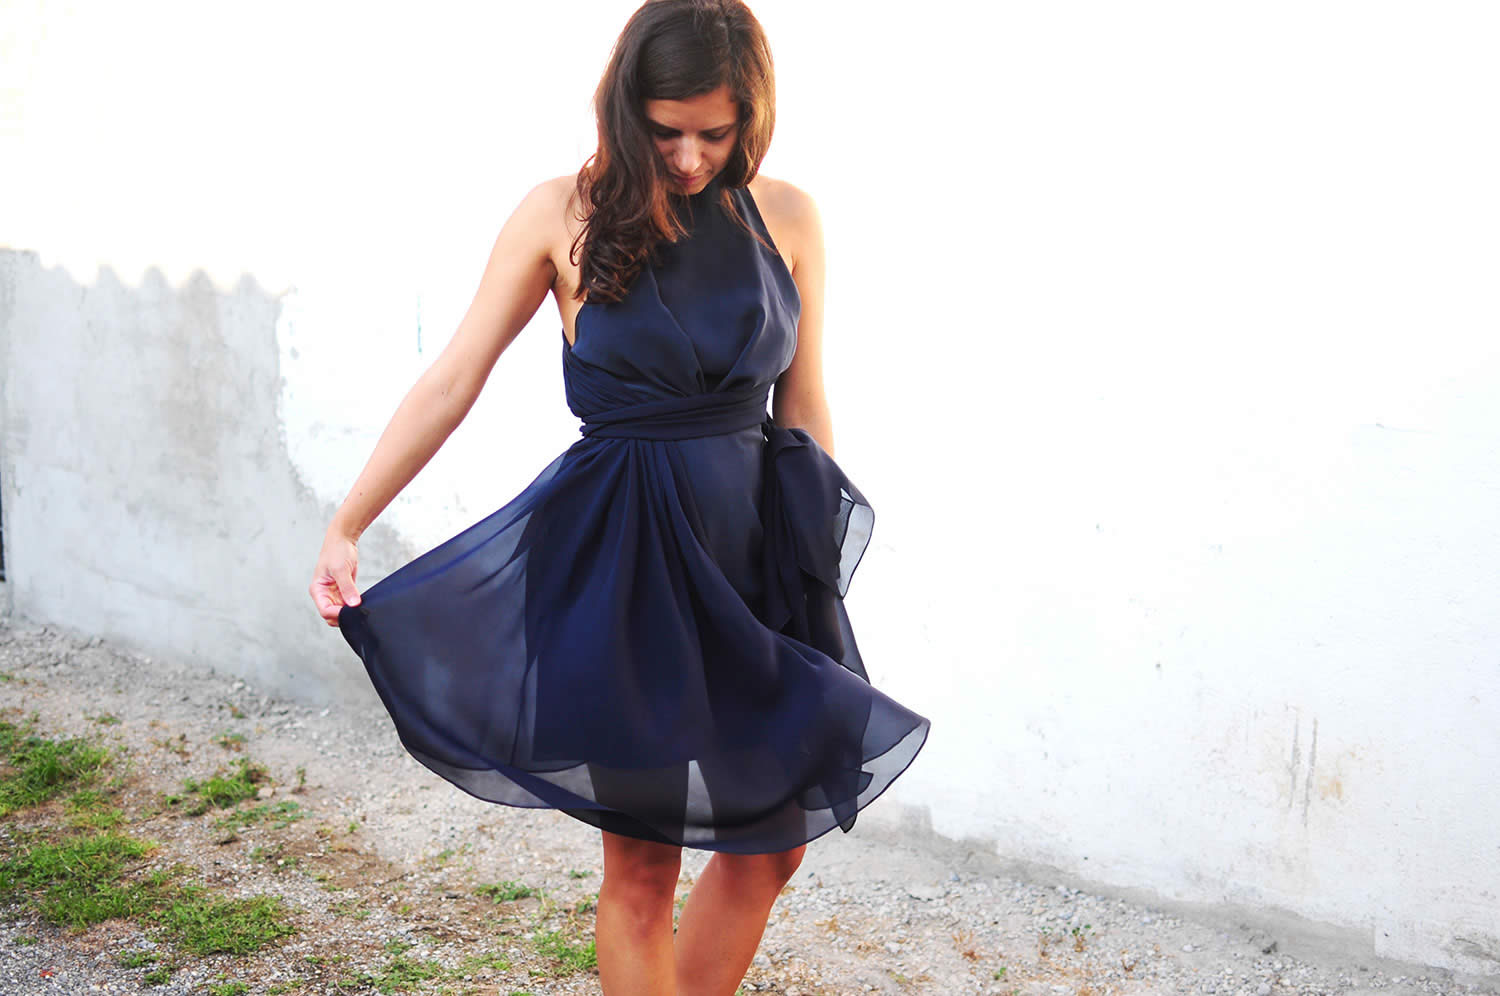
I found inspiration for some details of my dress on Pinterest (here you can find the short research I did) and then I freely draped the cloth on the dress-form to create this asymmetrical dress.
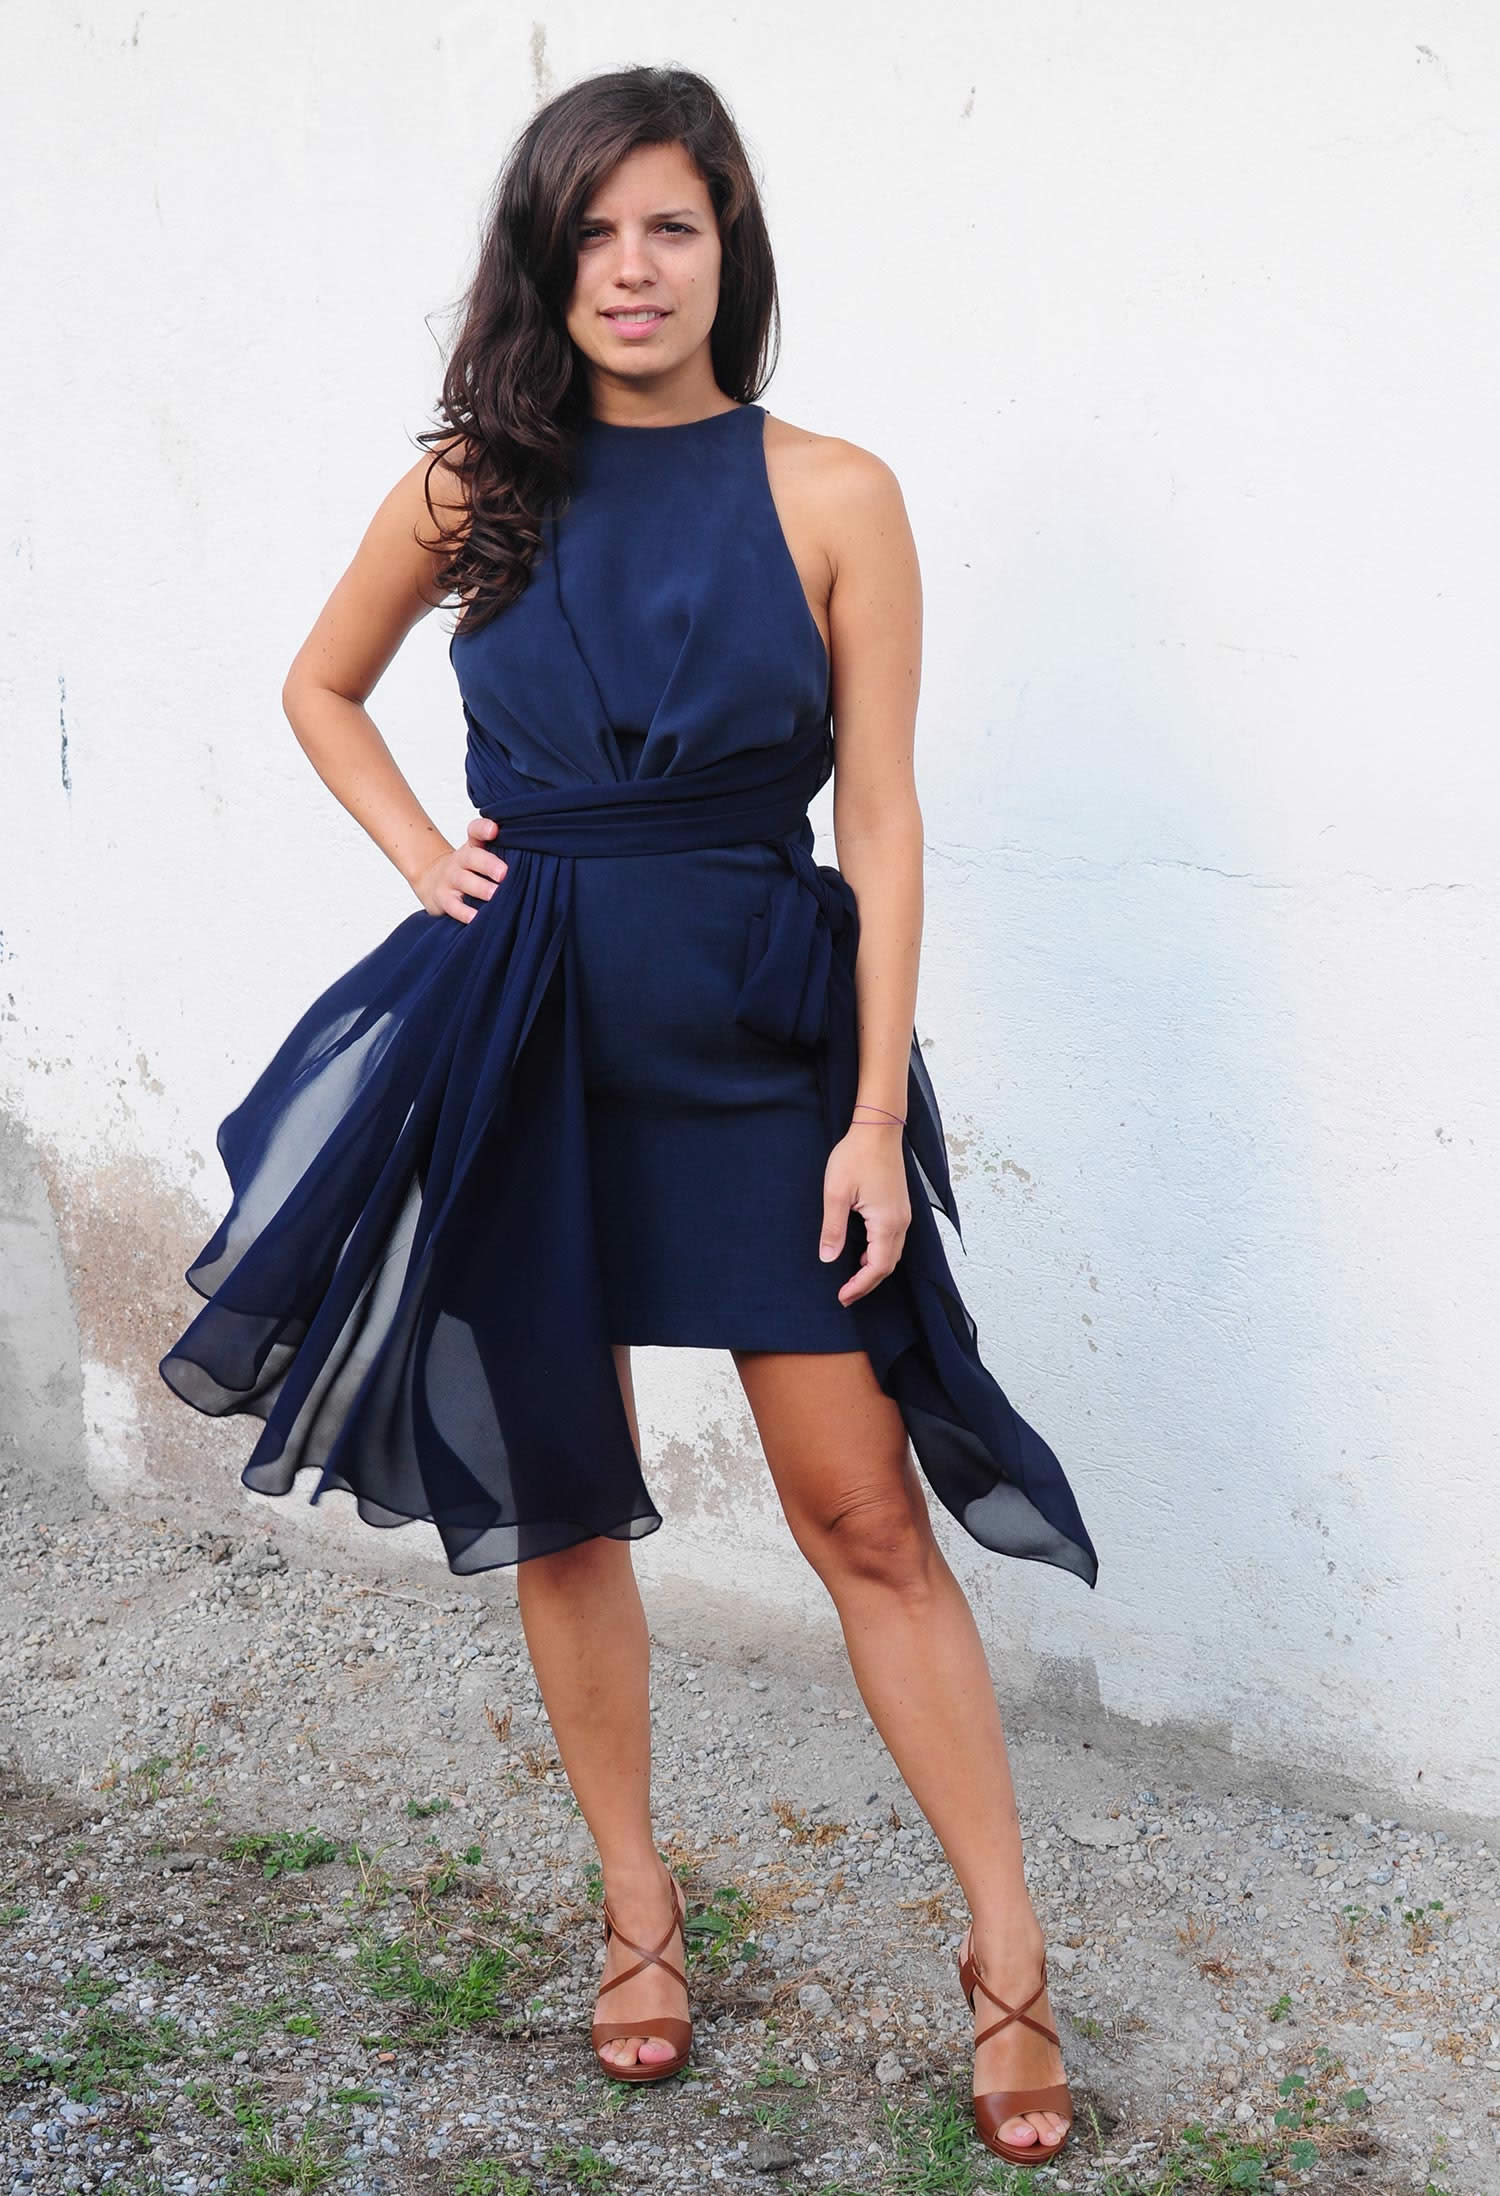
The structure of this dress is made out of a front bodice with halterneck and central folds on the waist and of a straight skirt. I made the front bodice and the skirt (front and back) in the shantung silk.
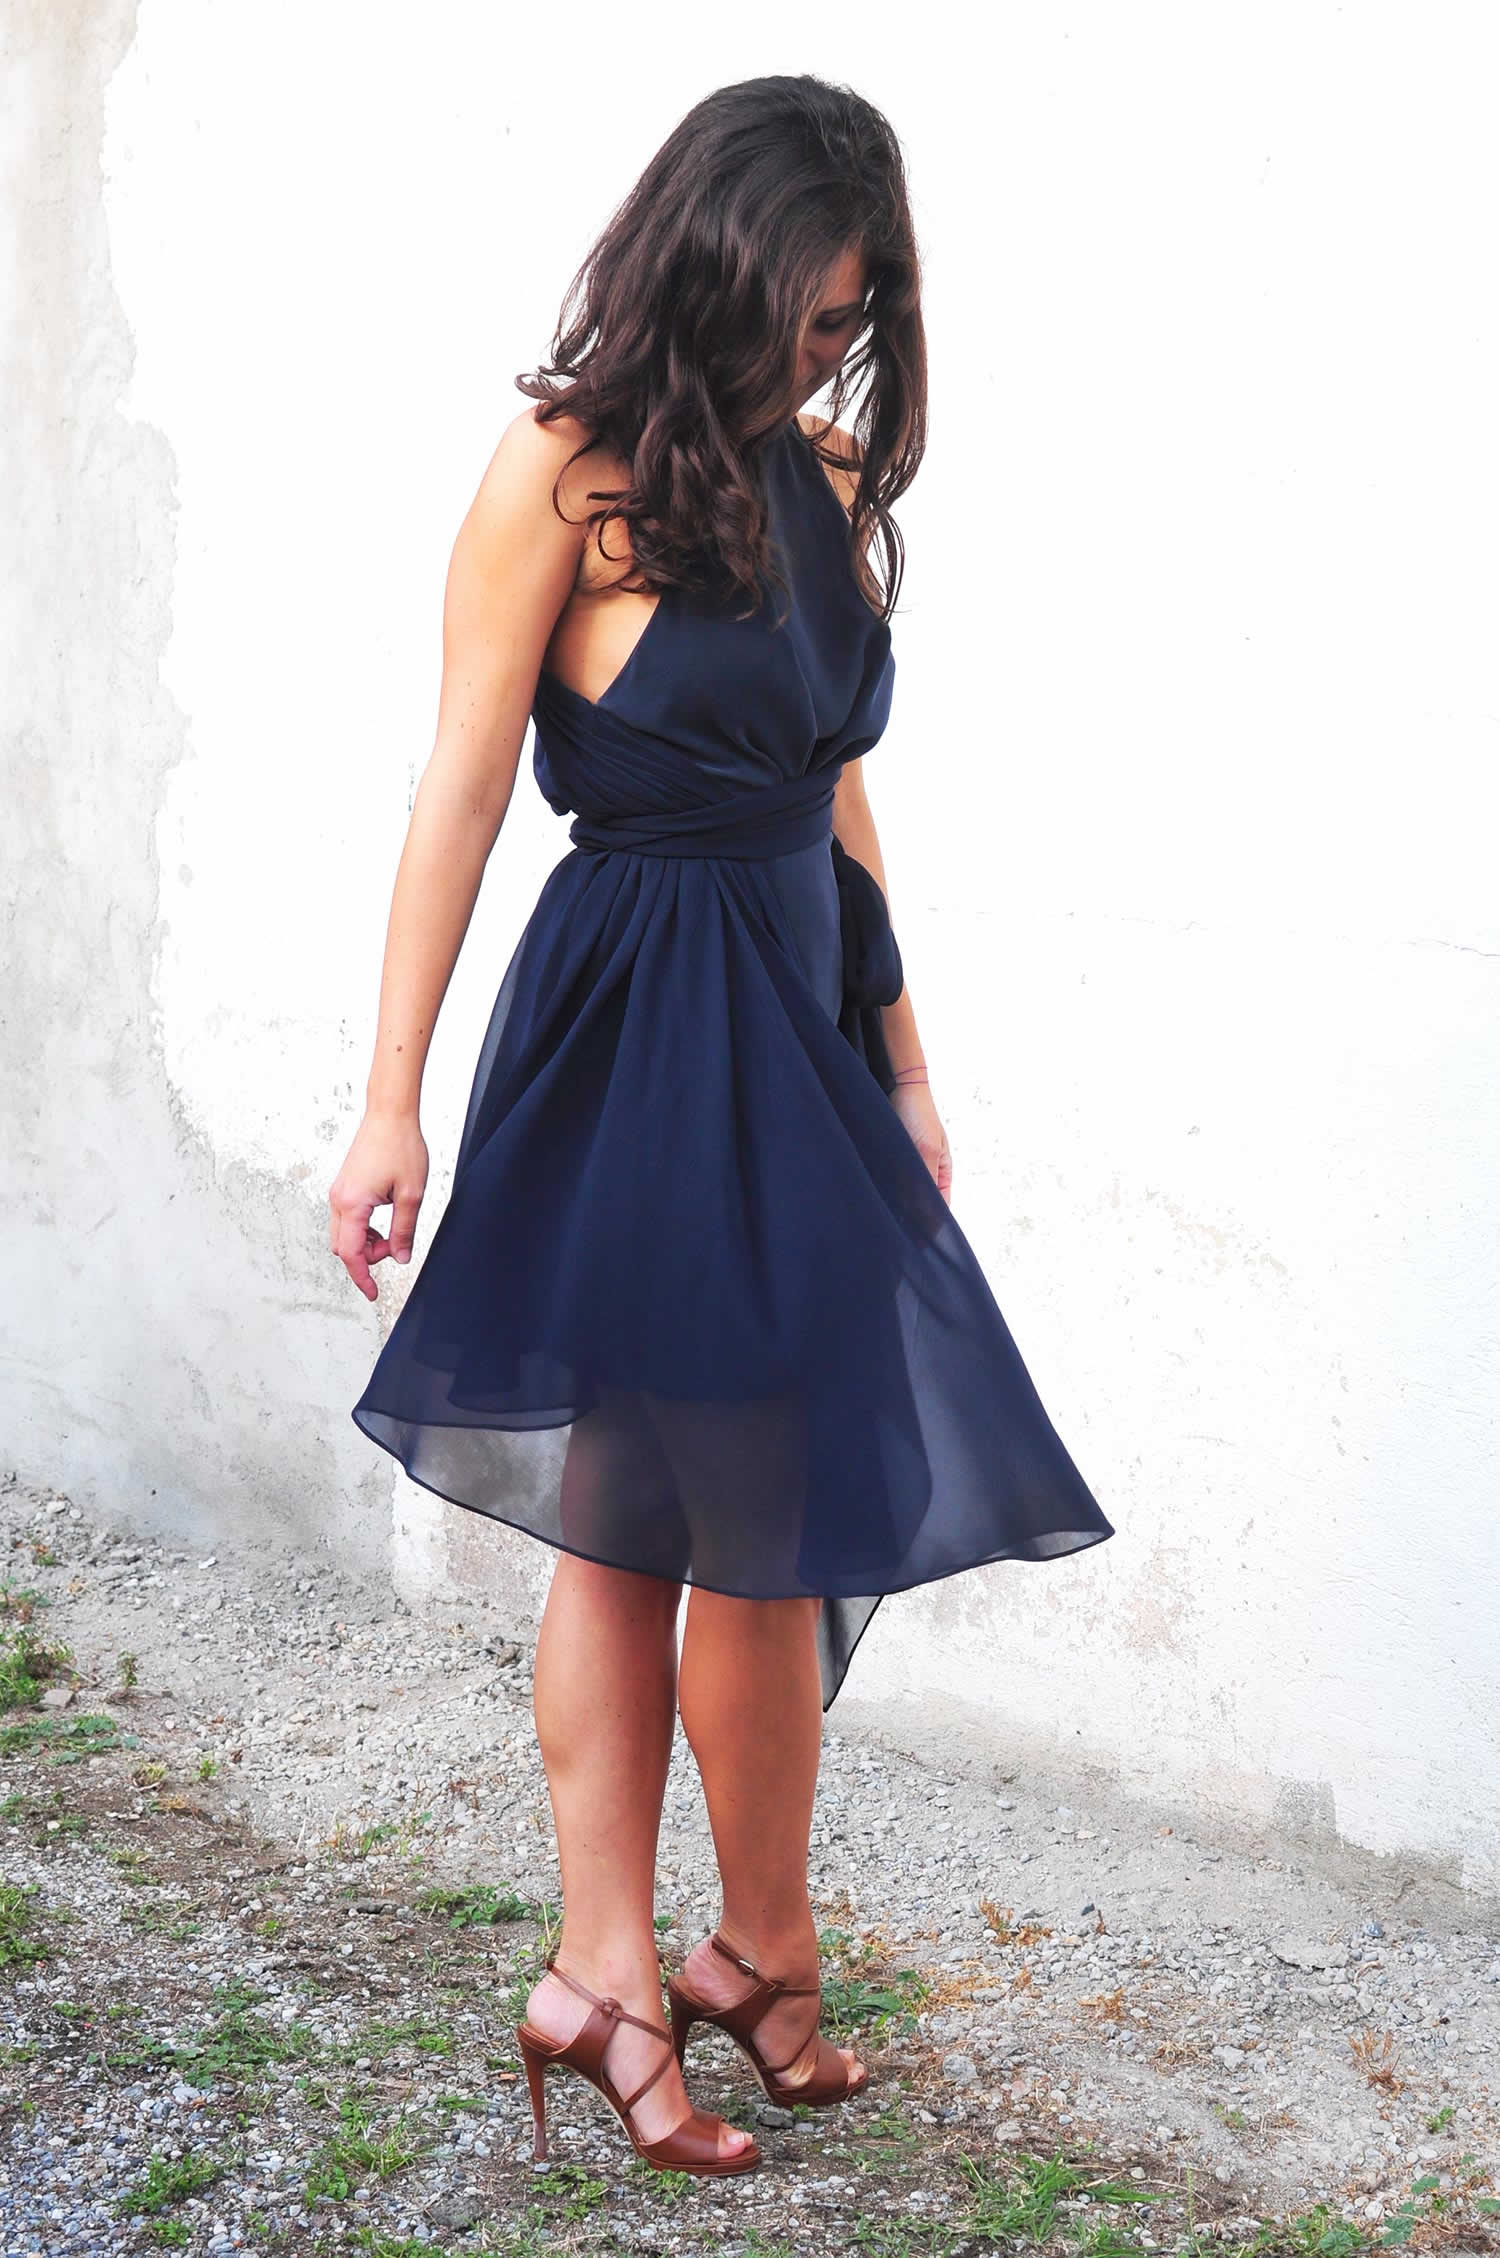
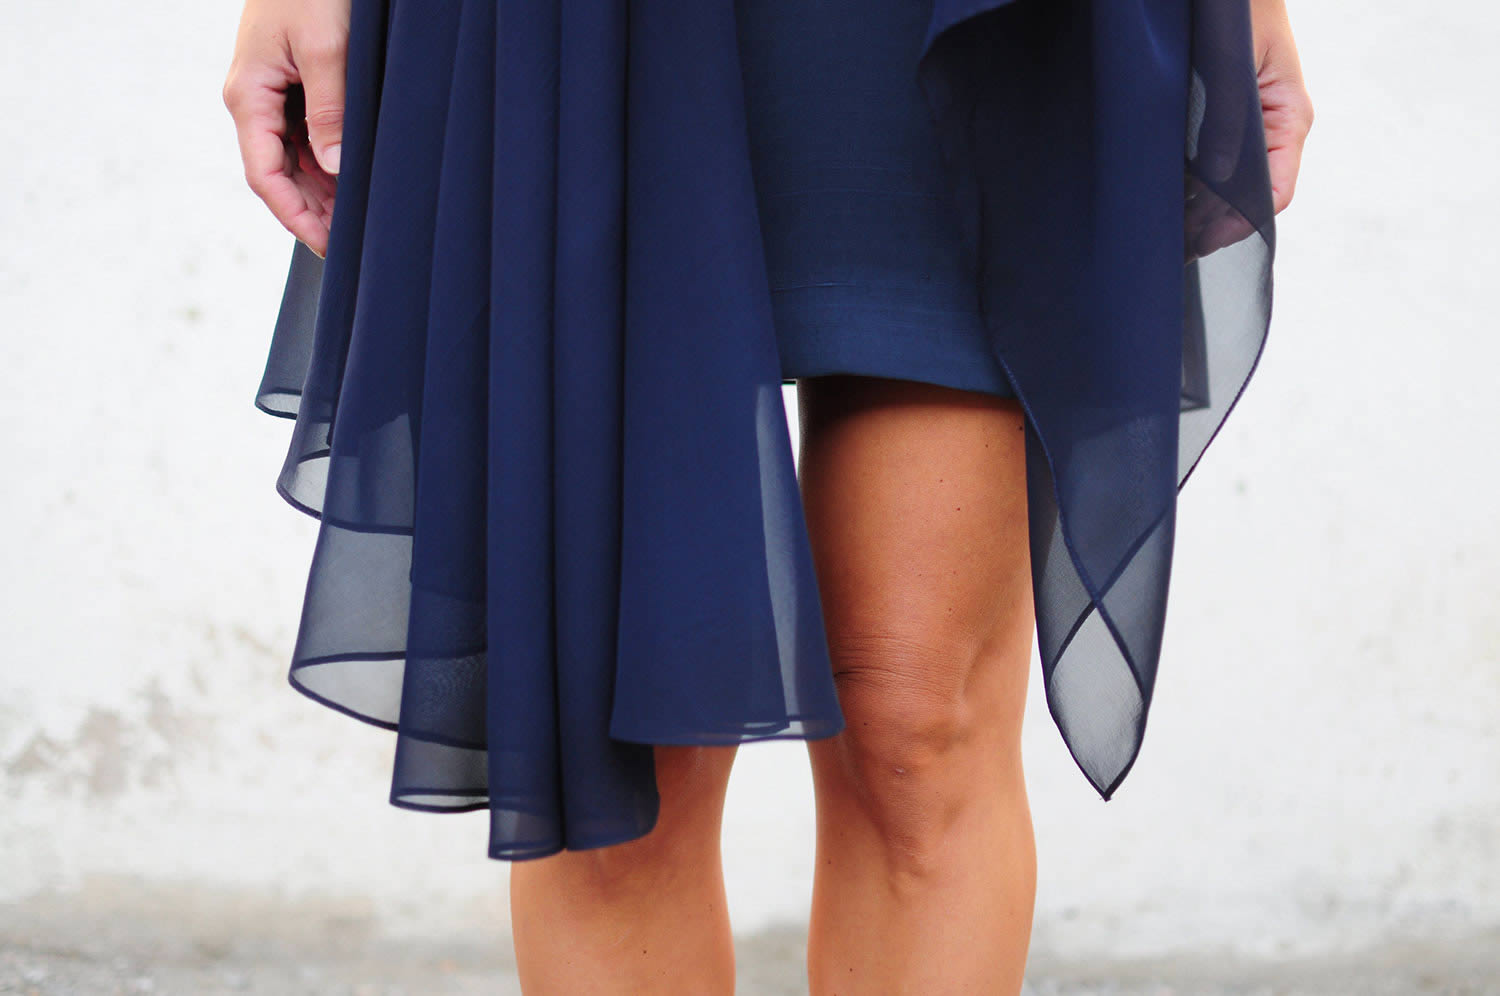
Then I draped panels of fabric in an asymmetrical way on this basic structure (made out of the front bodice and the skirt), to create the back and the two sides of the dress. I used the silk voile to made these panels. The back and the right side are made out of two voile panels, sewed together with a french seam, that is almost invisible because it’s hidden under the right drape.
Here you can see the right side of the dress:
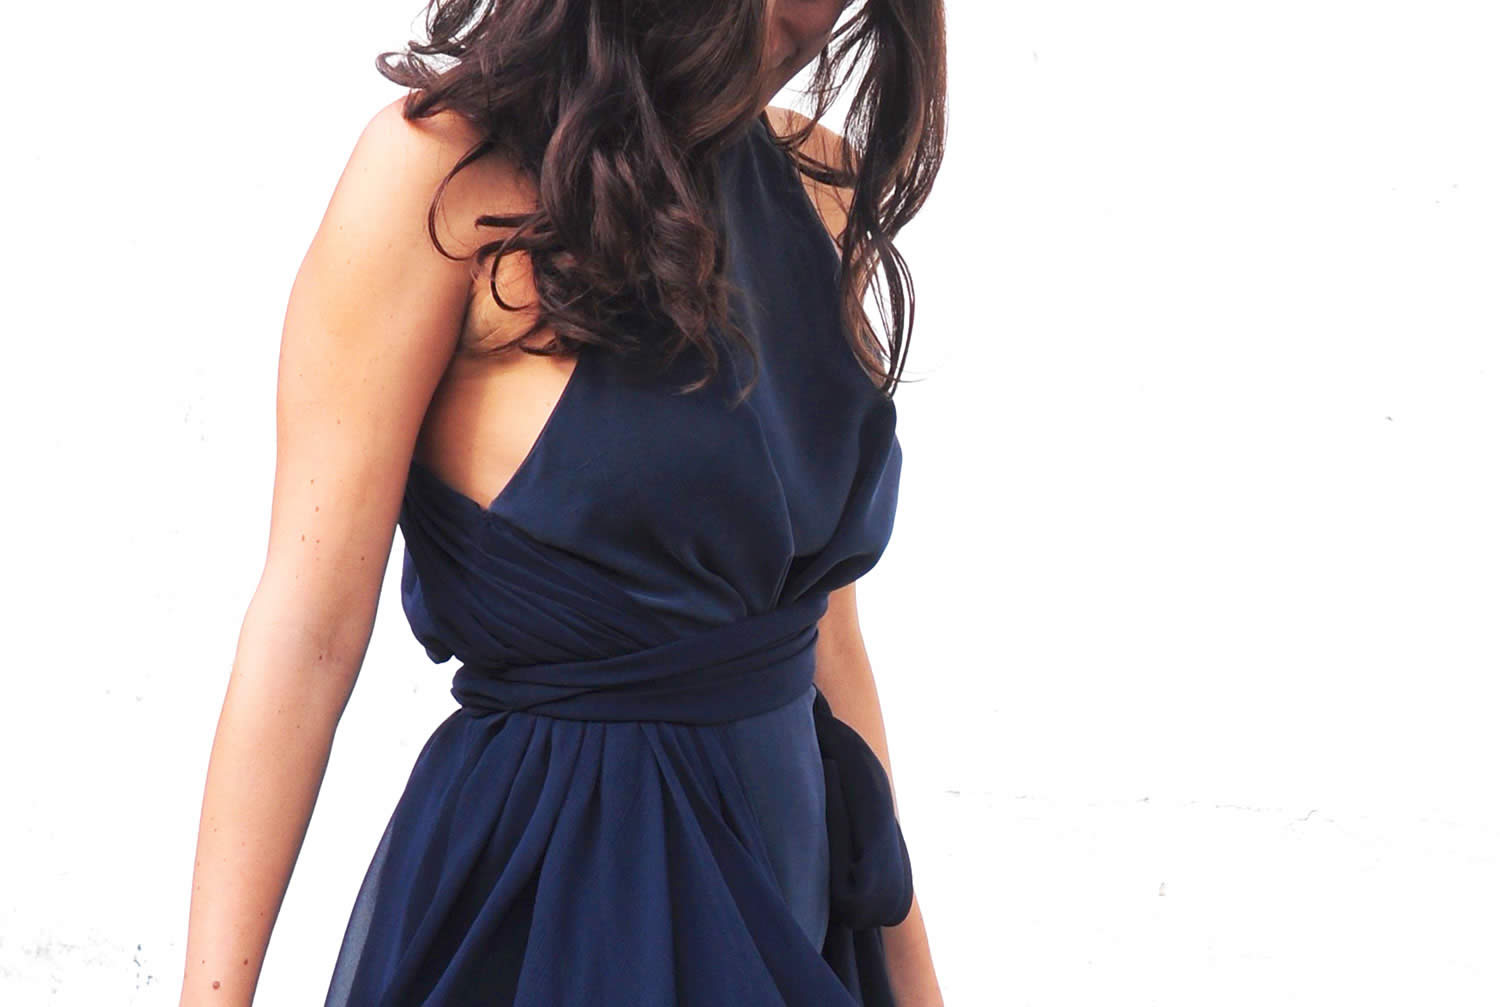
The back:
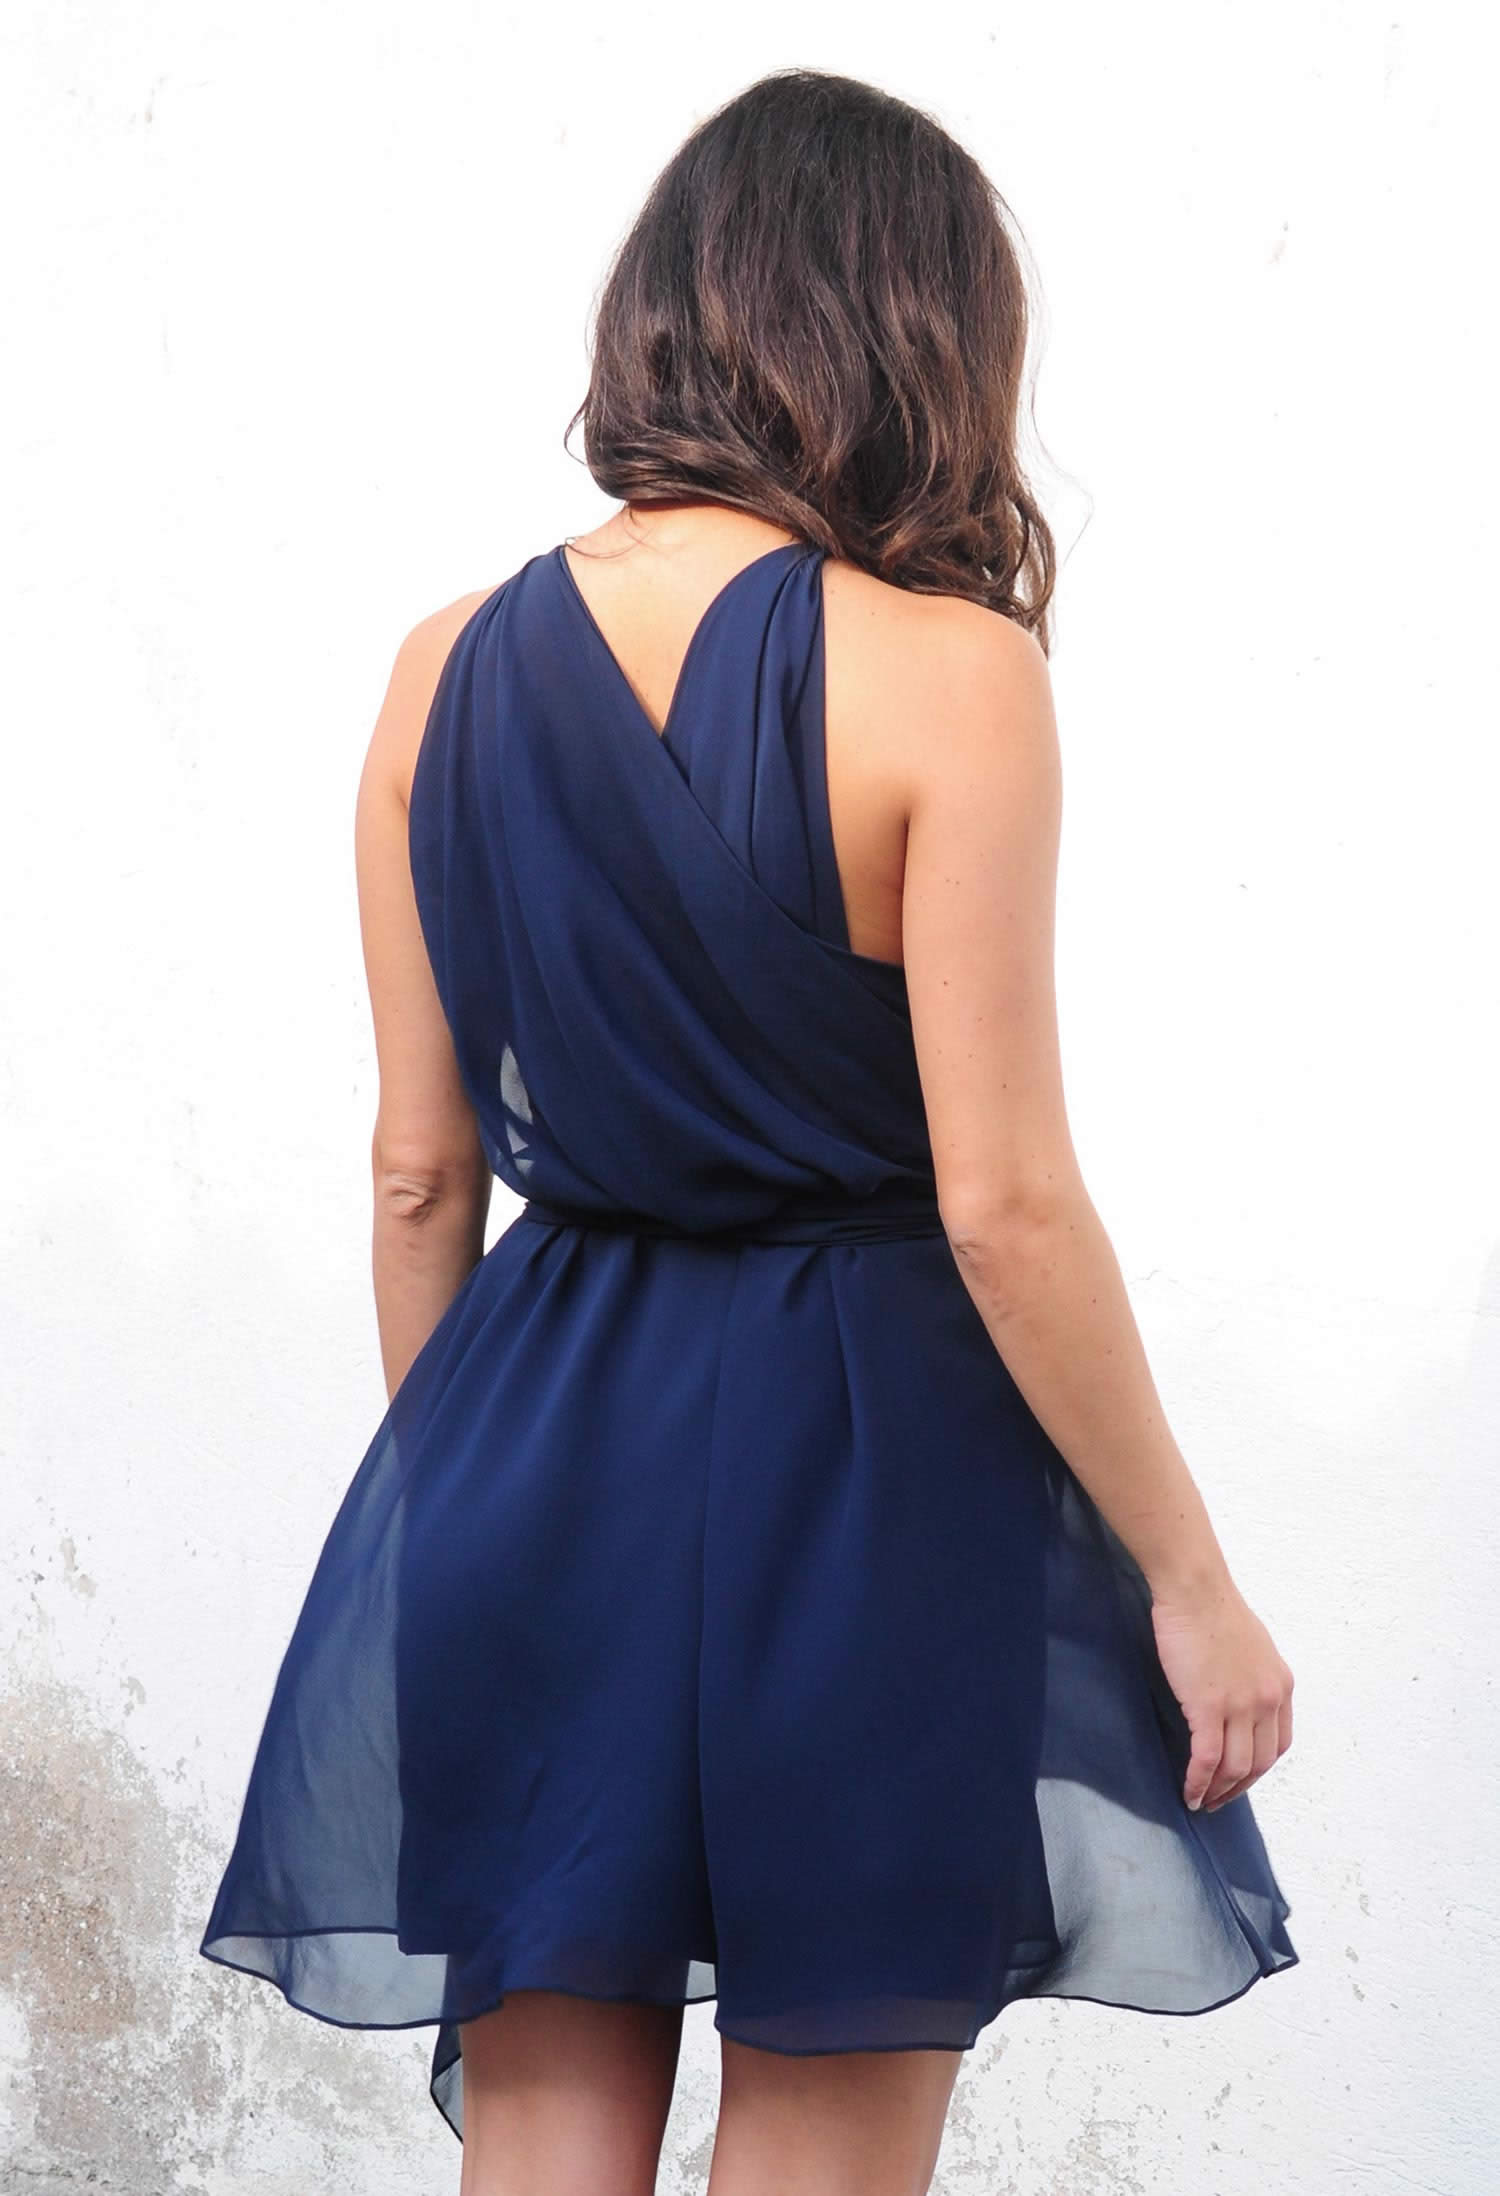
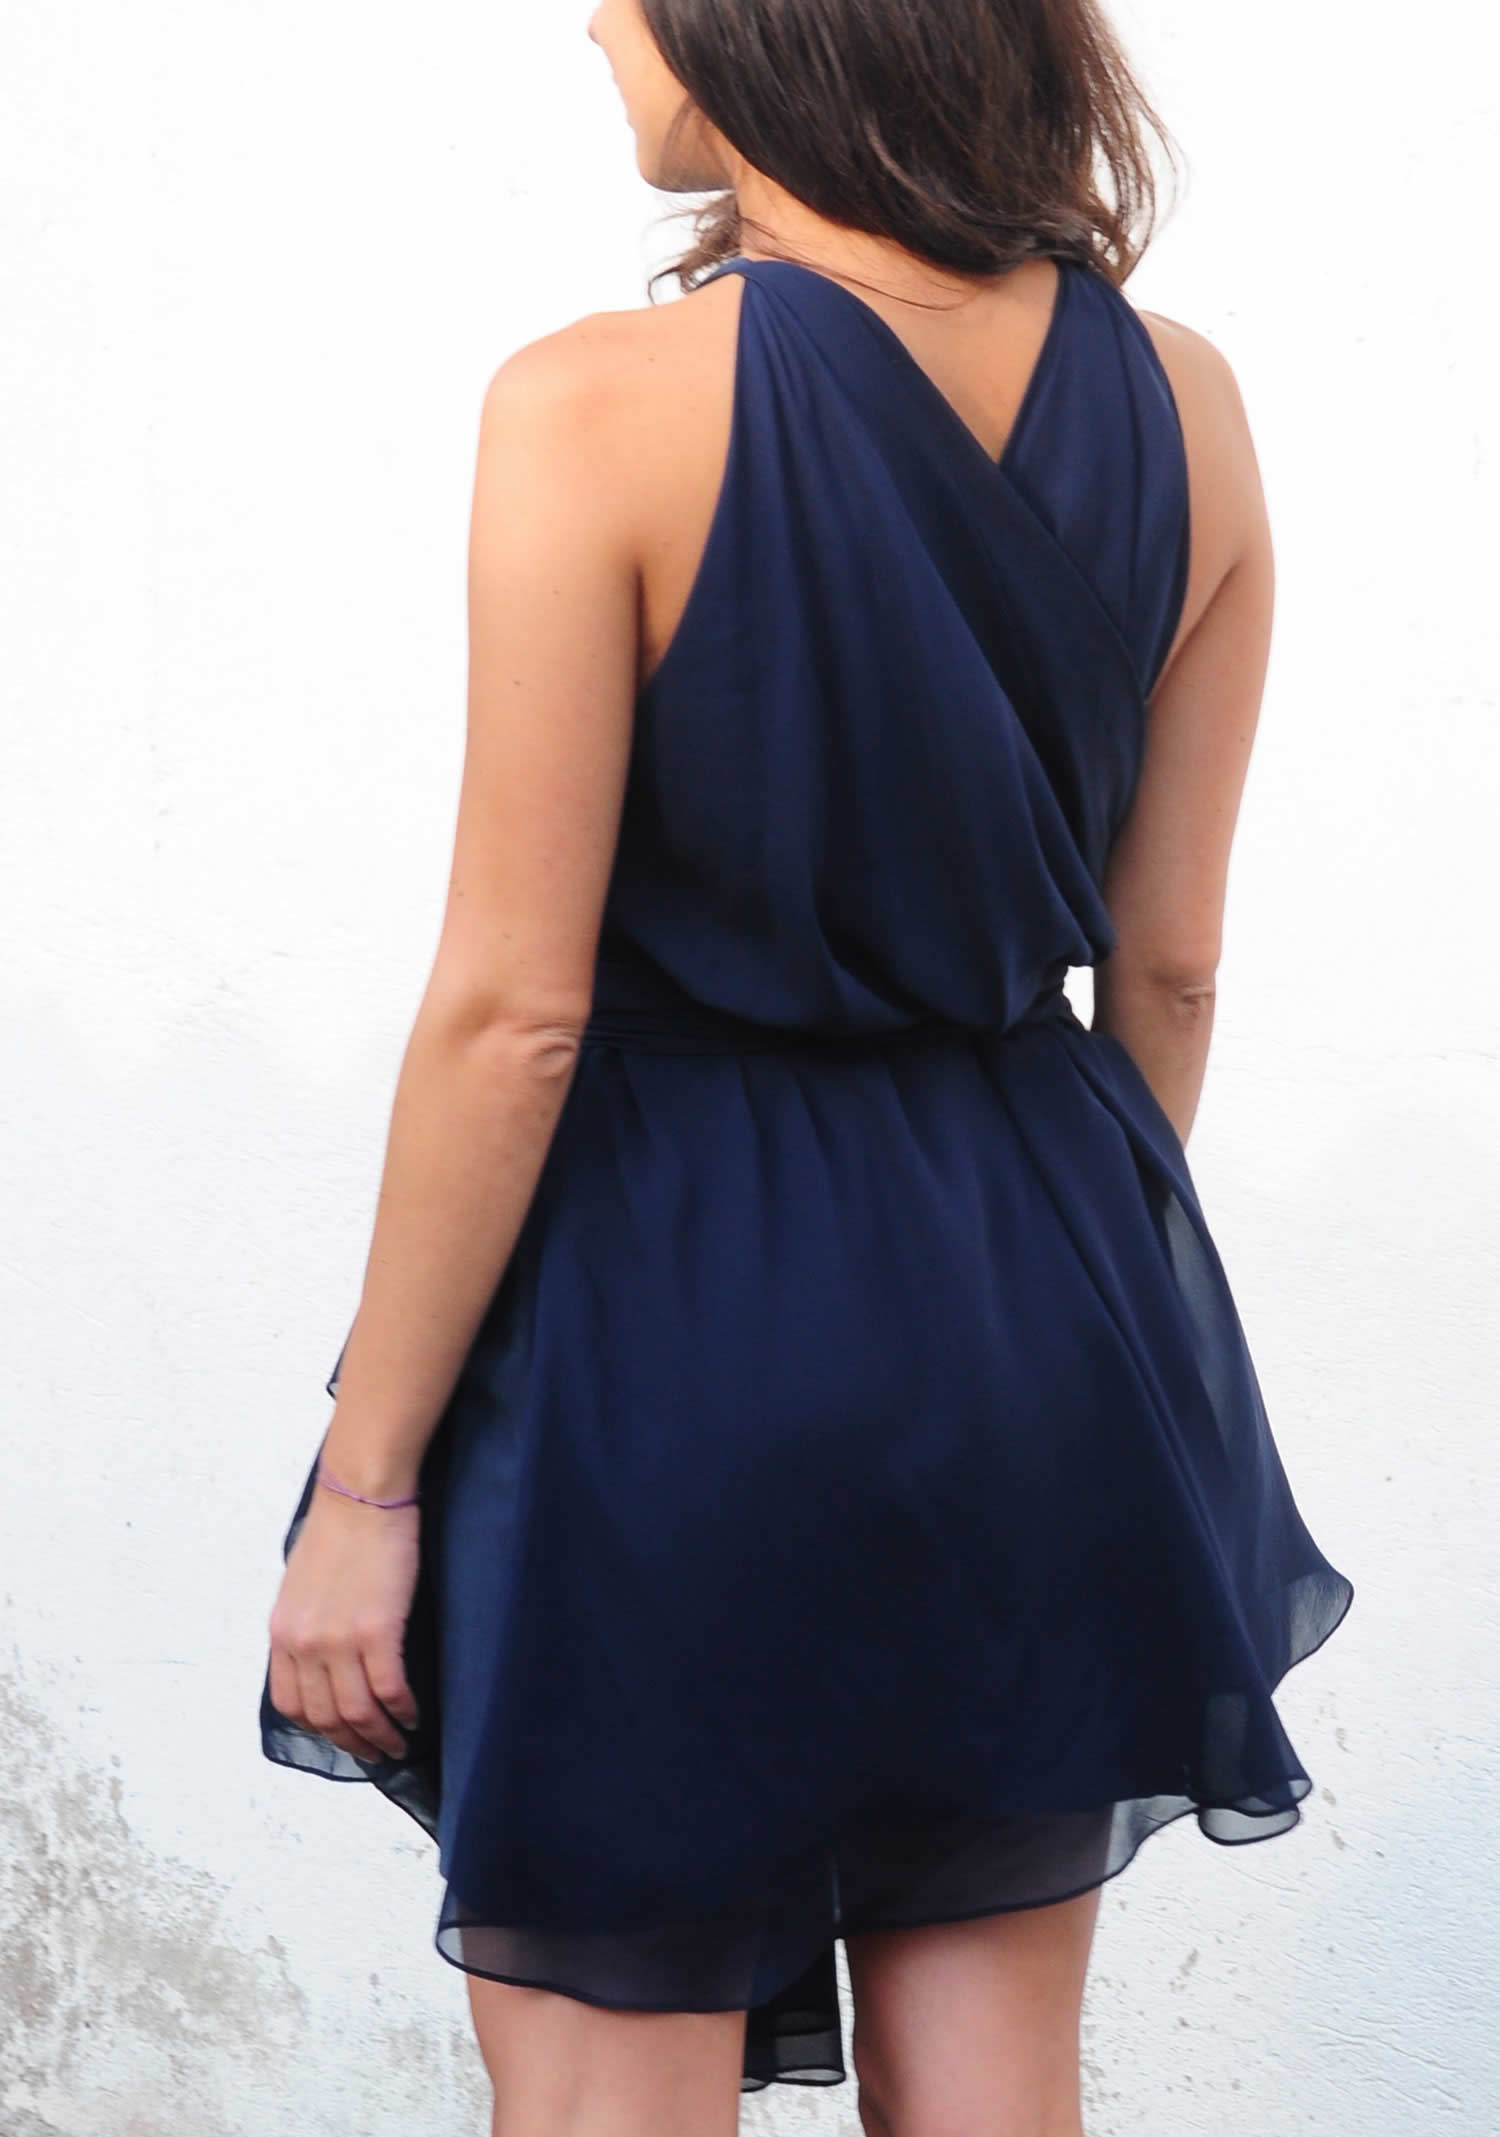
Here is the left side of the dress instead, in which I sewed the zipper and draped a bow, to balance the right side. The skirt in shantung and the voile panel of the back are sewed together in the left side seam.
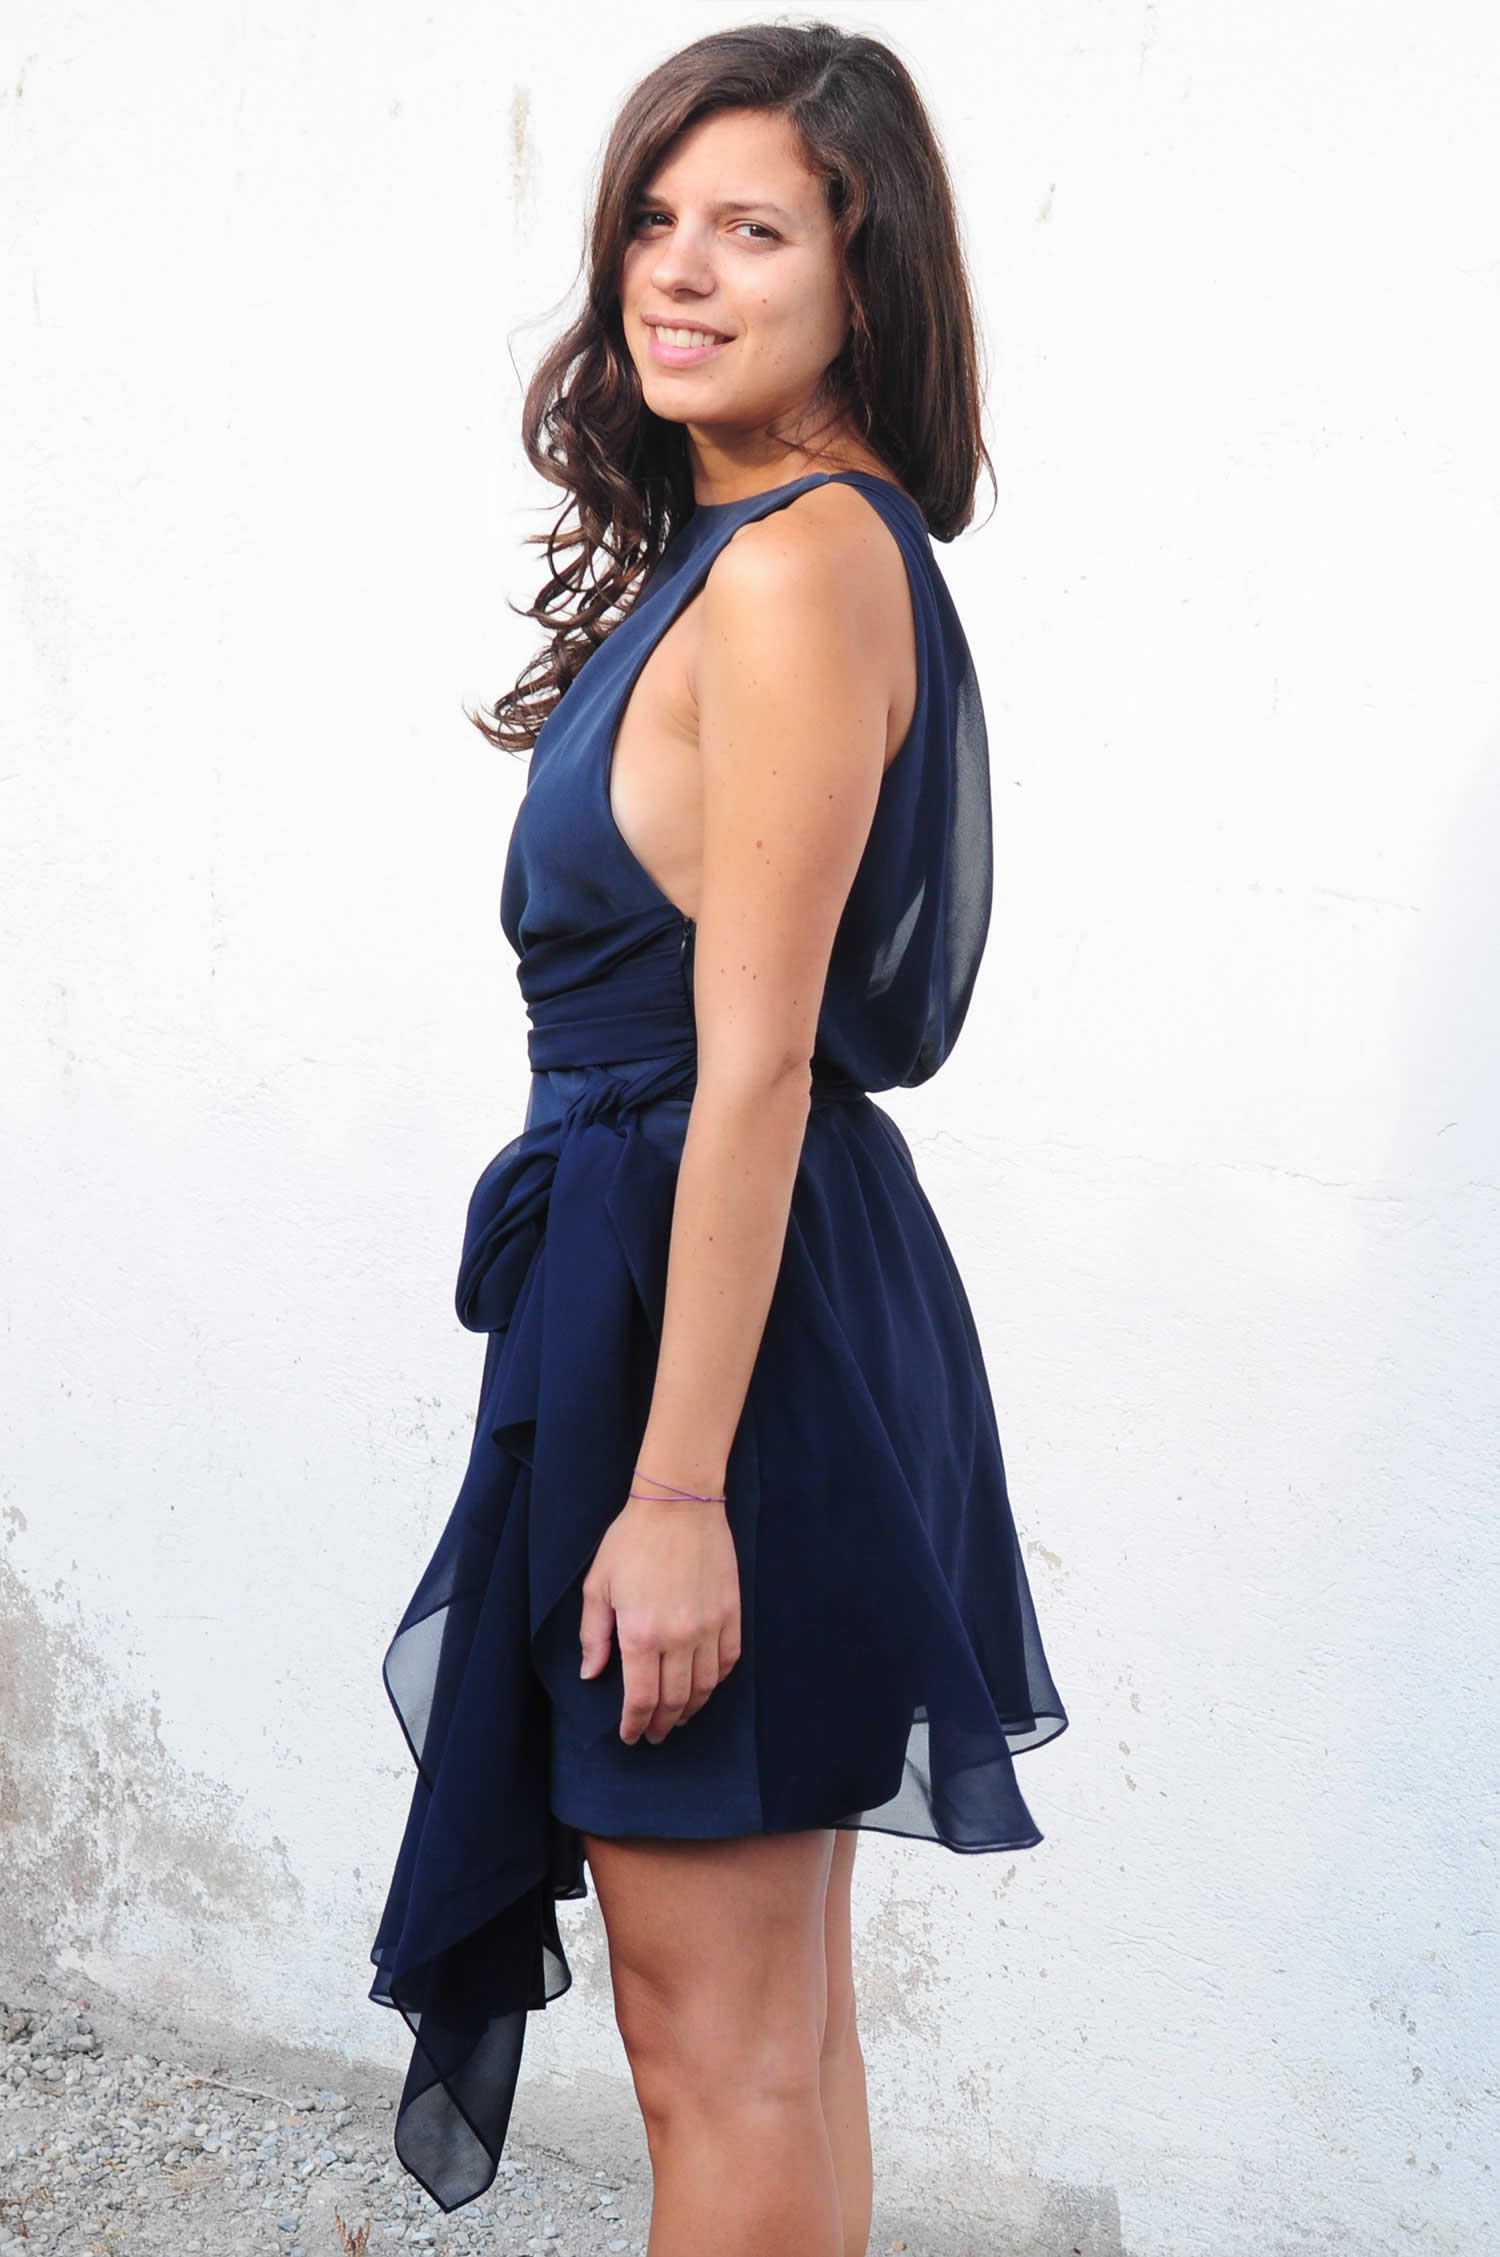
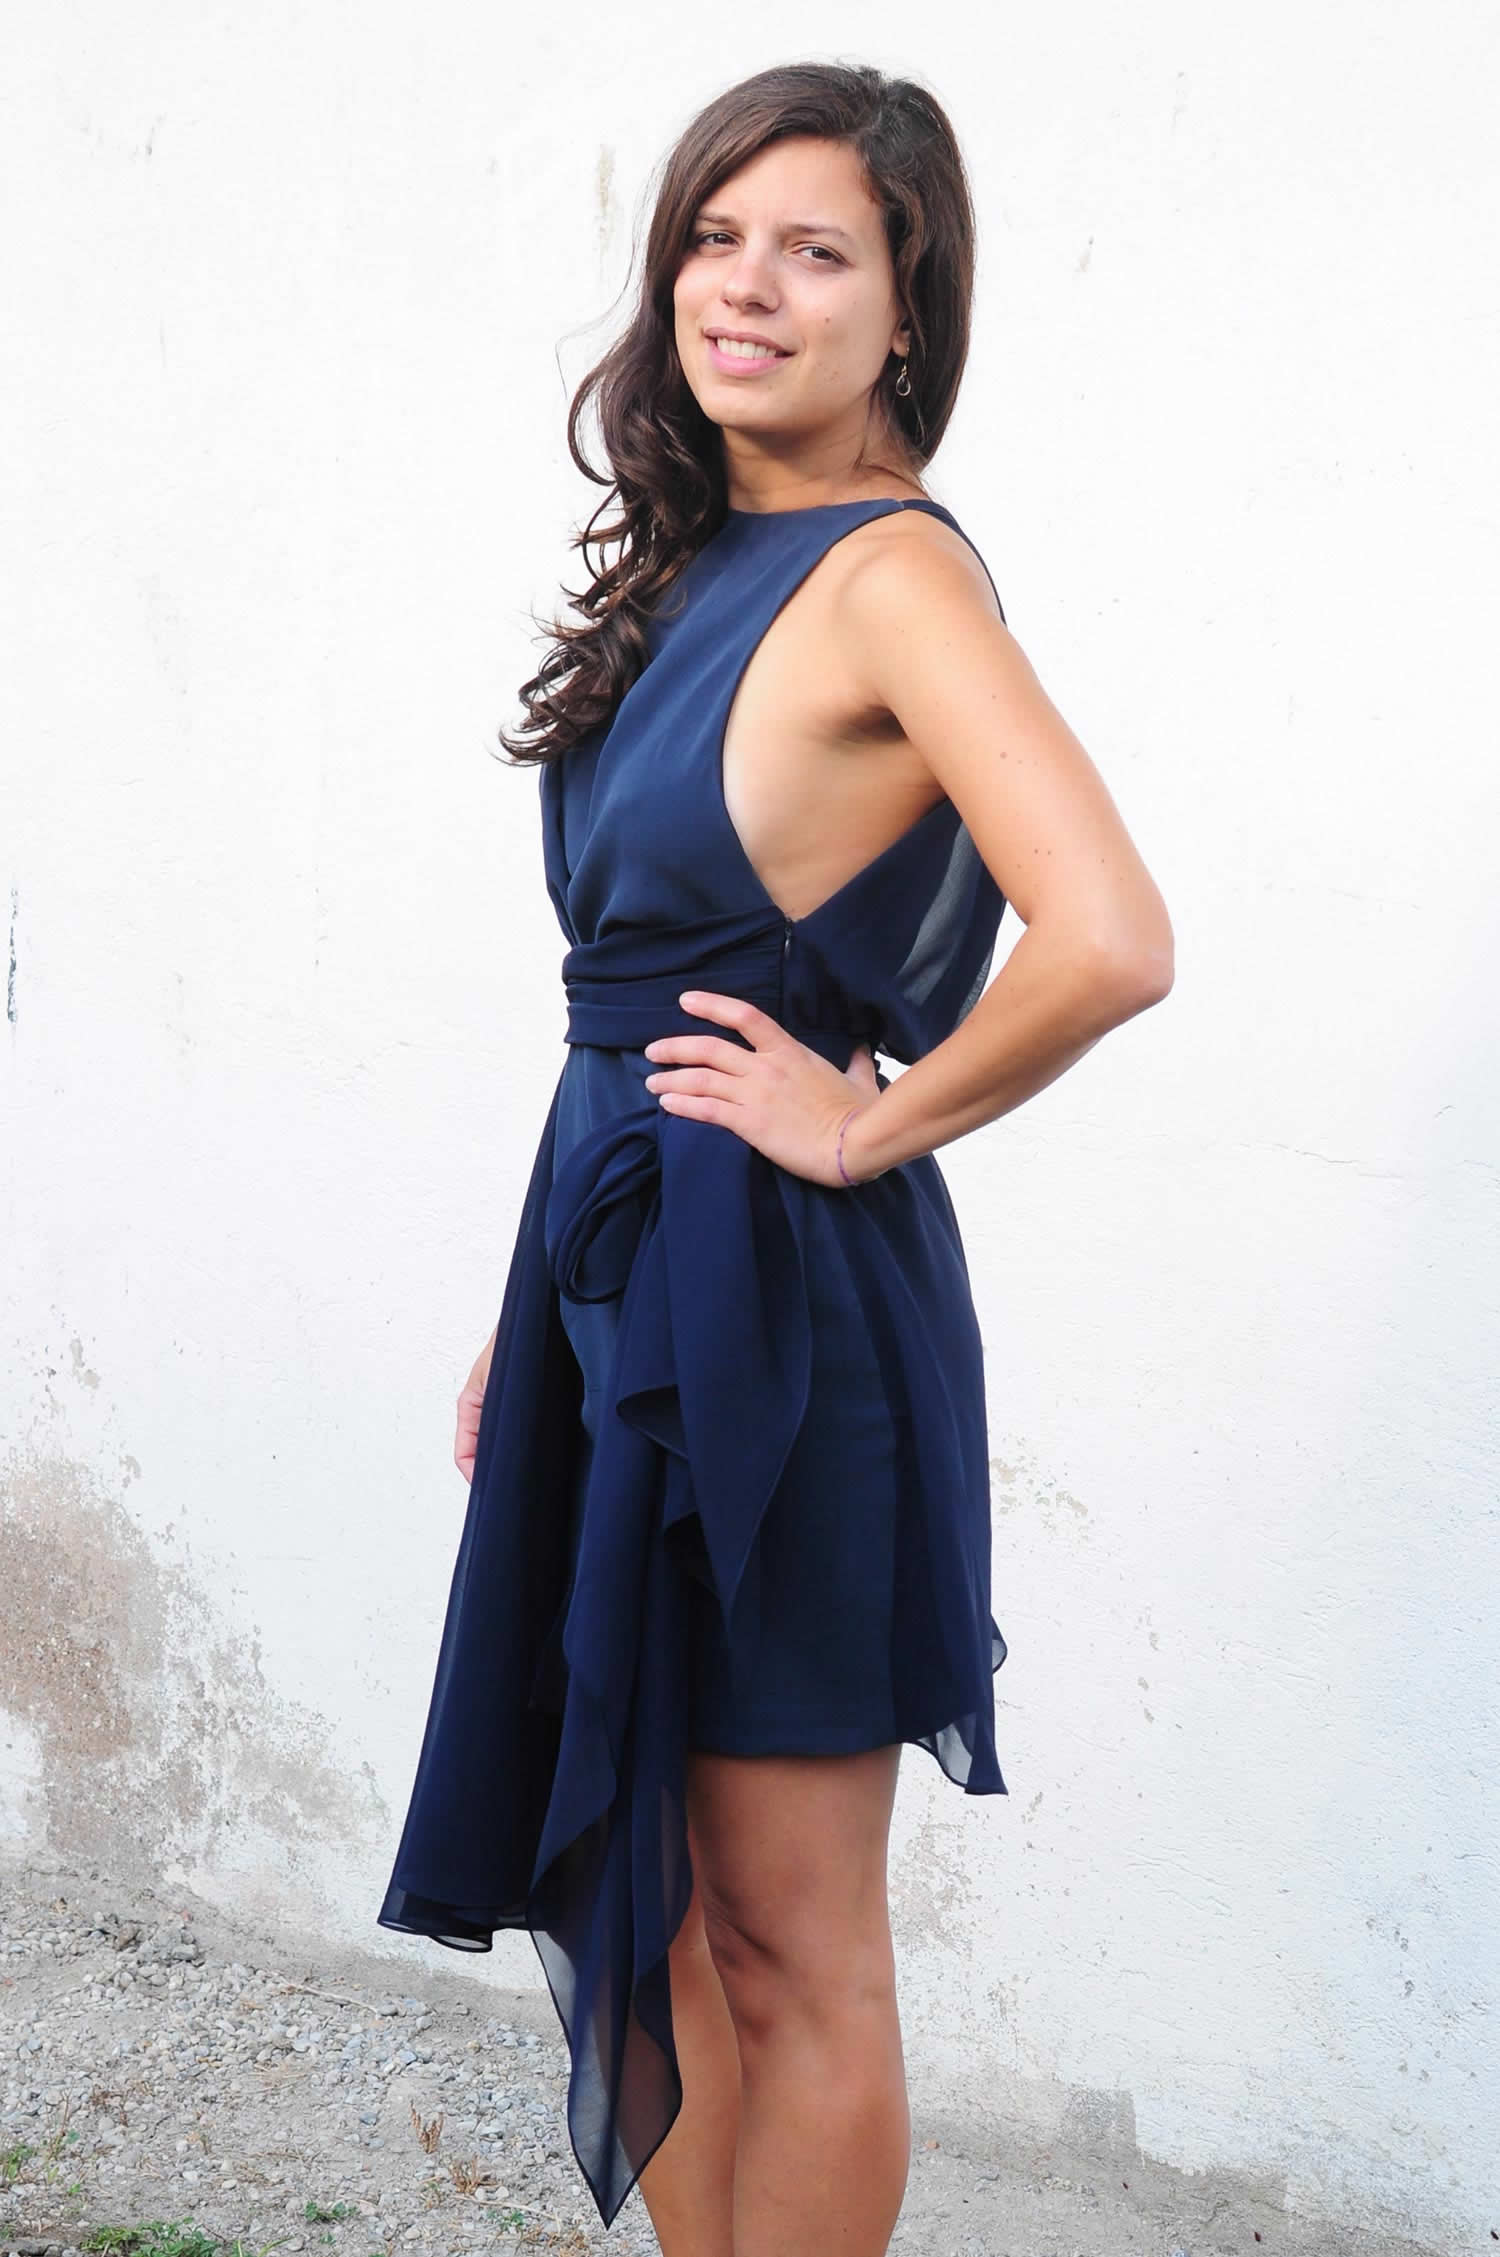

In the end, I draped a waistband, asymmetrical on the front, that ended up on the left bow.
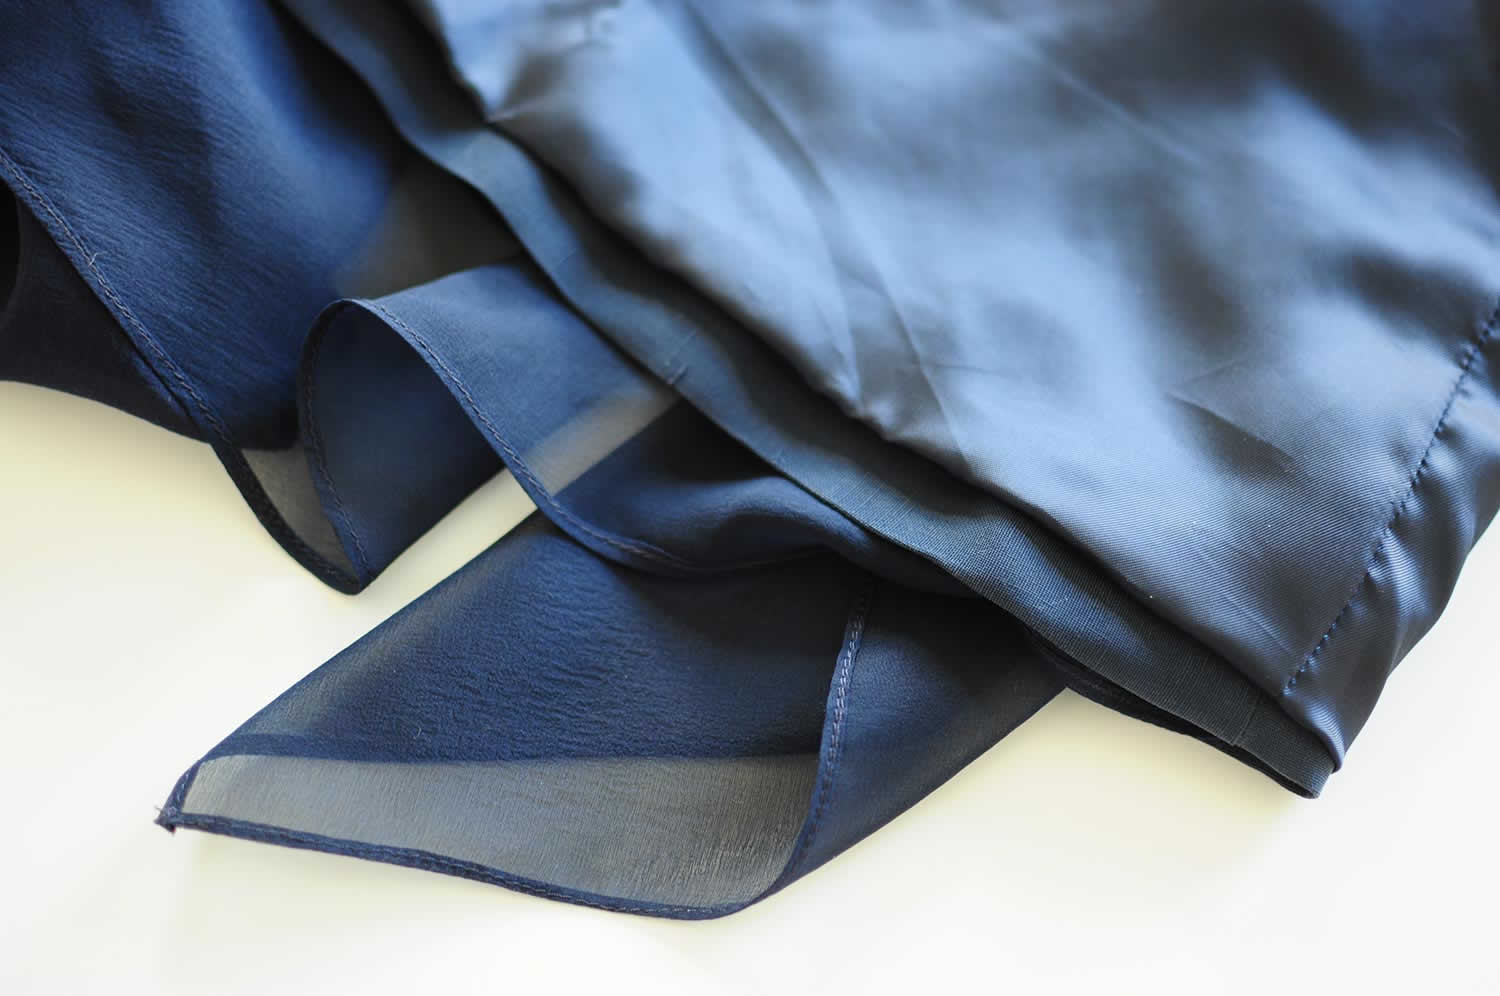
I hemmed the voile panels with a thin pin hem (you can find how to sew a pin hem in this post).
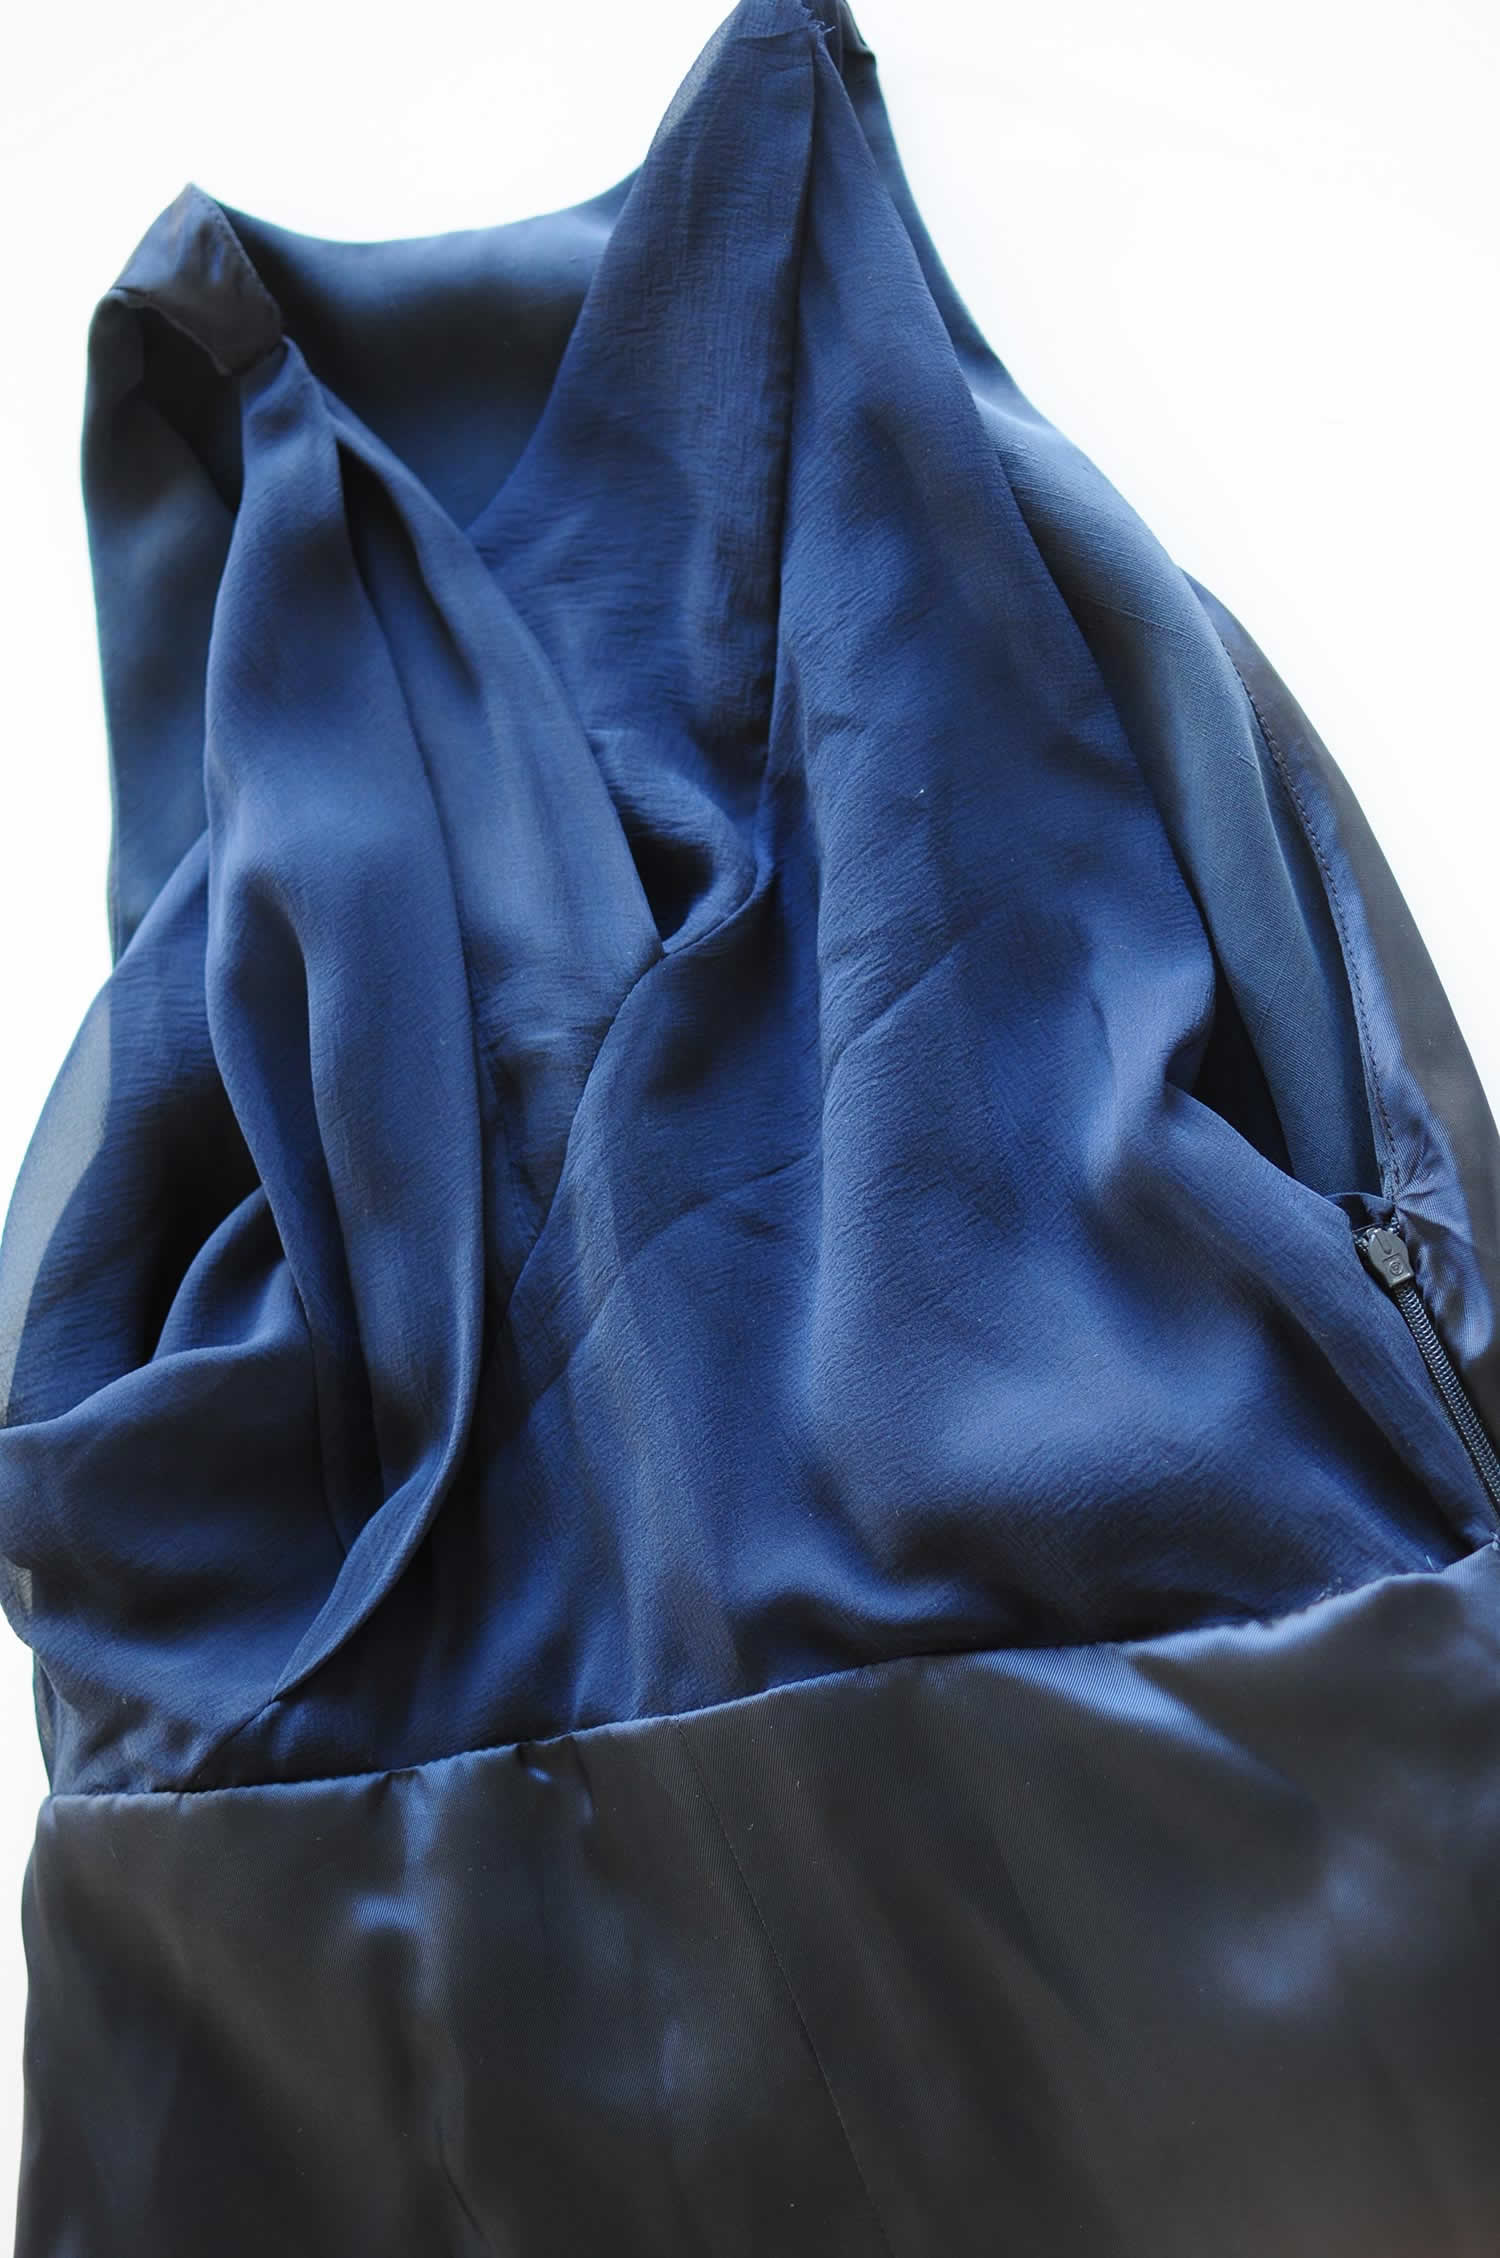
I lined the inside of the dress with a classic blue lining. I used the voile fabric to line the back bodice instead, to keep it sheer.
Here is a picture of the inside of the dress and of the hems:
I used the Draping on the stand technique for the first time in this occasion and I have to say that create a garment on the dress-form is very fun and useful, above all when you have to deal with drapes or complex asymmetrical dresses, difficult to draft with the traditional pattern-making techniques. The most difficult steps have been turning the first muslin/dress in cotton into a pattern that I used to cut the silk fabrics, understanding how to sew all the pieces together and how to line the inside. It has been a quite long process, but I’ve learned a lot making this dress and I’m very happy with the final result!
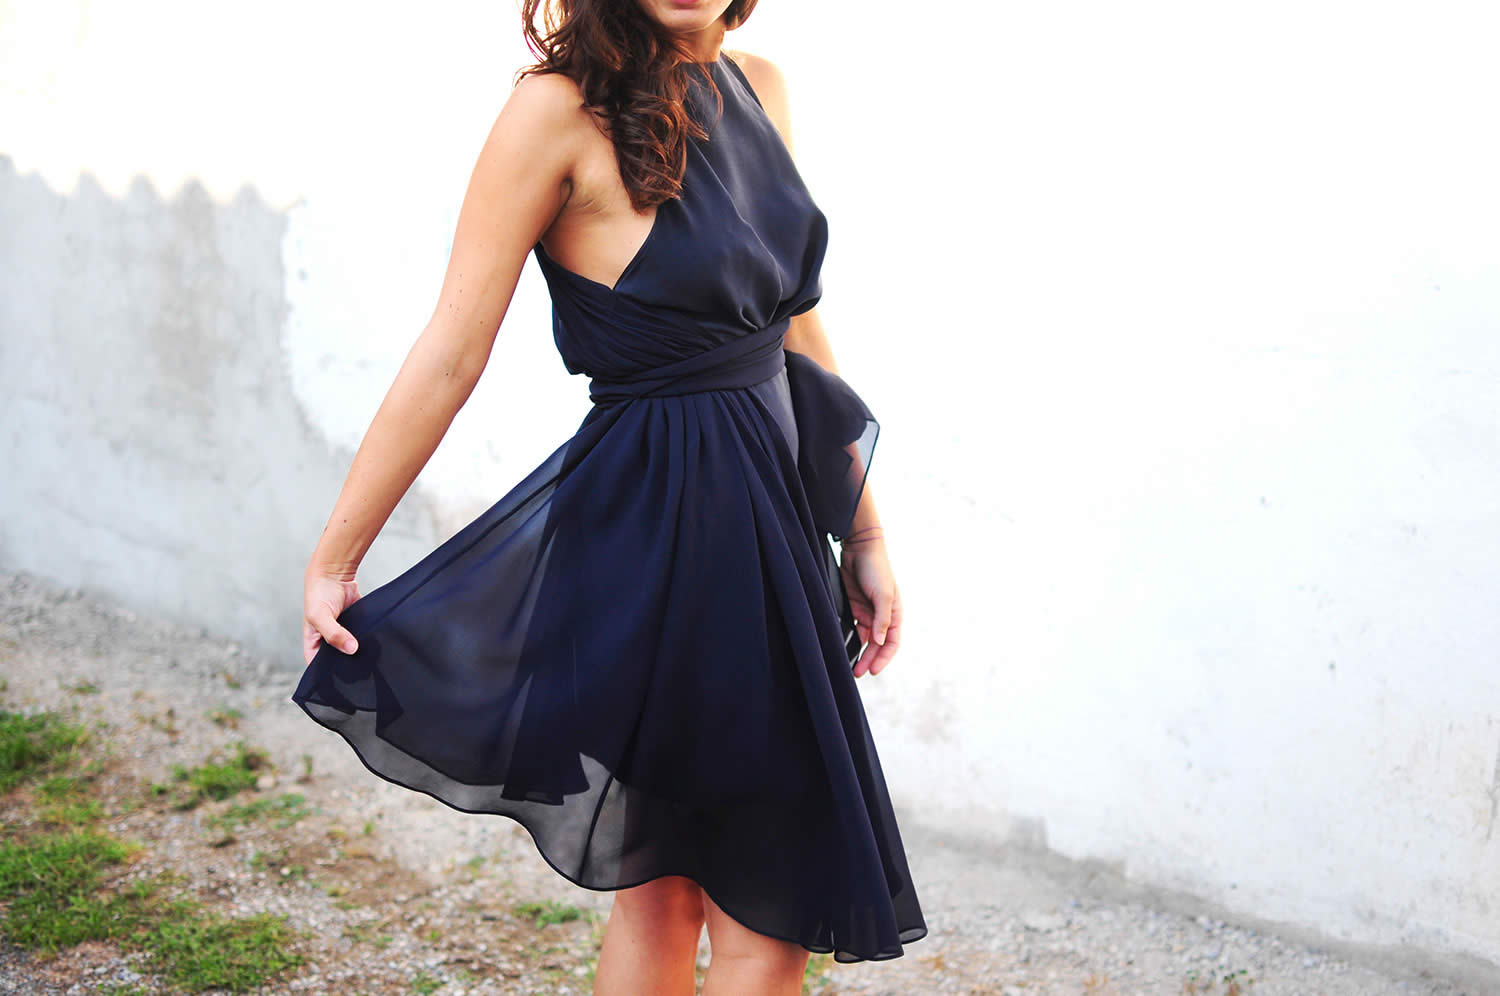
It’s not exactly an everyday dress (I feel like a diva when I wear it 🙂 ), so I’ll keep it with care in my wardrobe waiting for the right/special occasion to wear it!
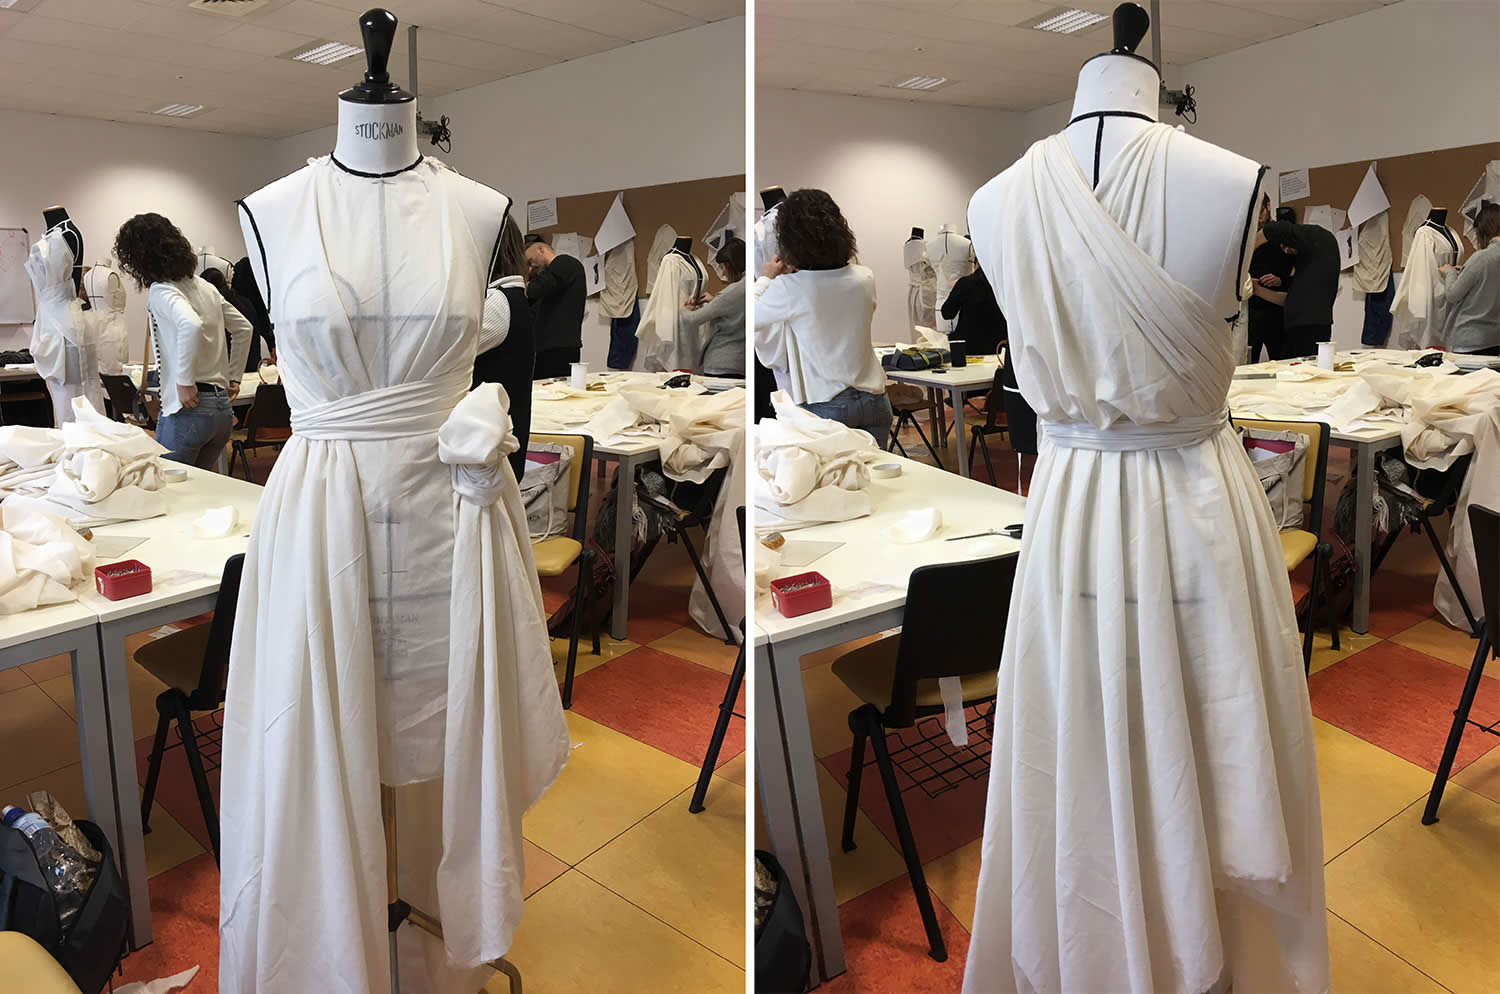
In the end, here are some pictures of the work in progress…
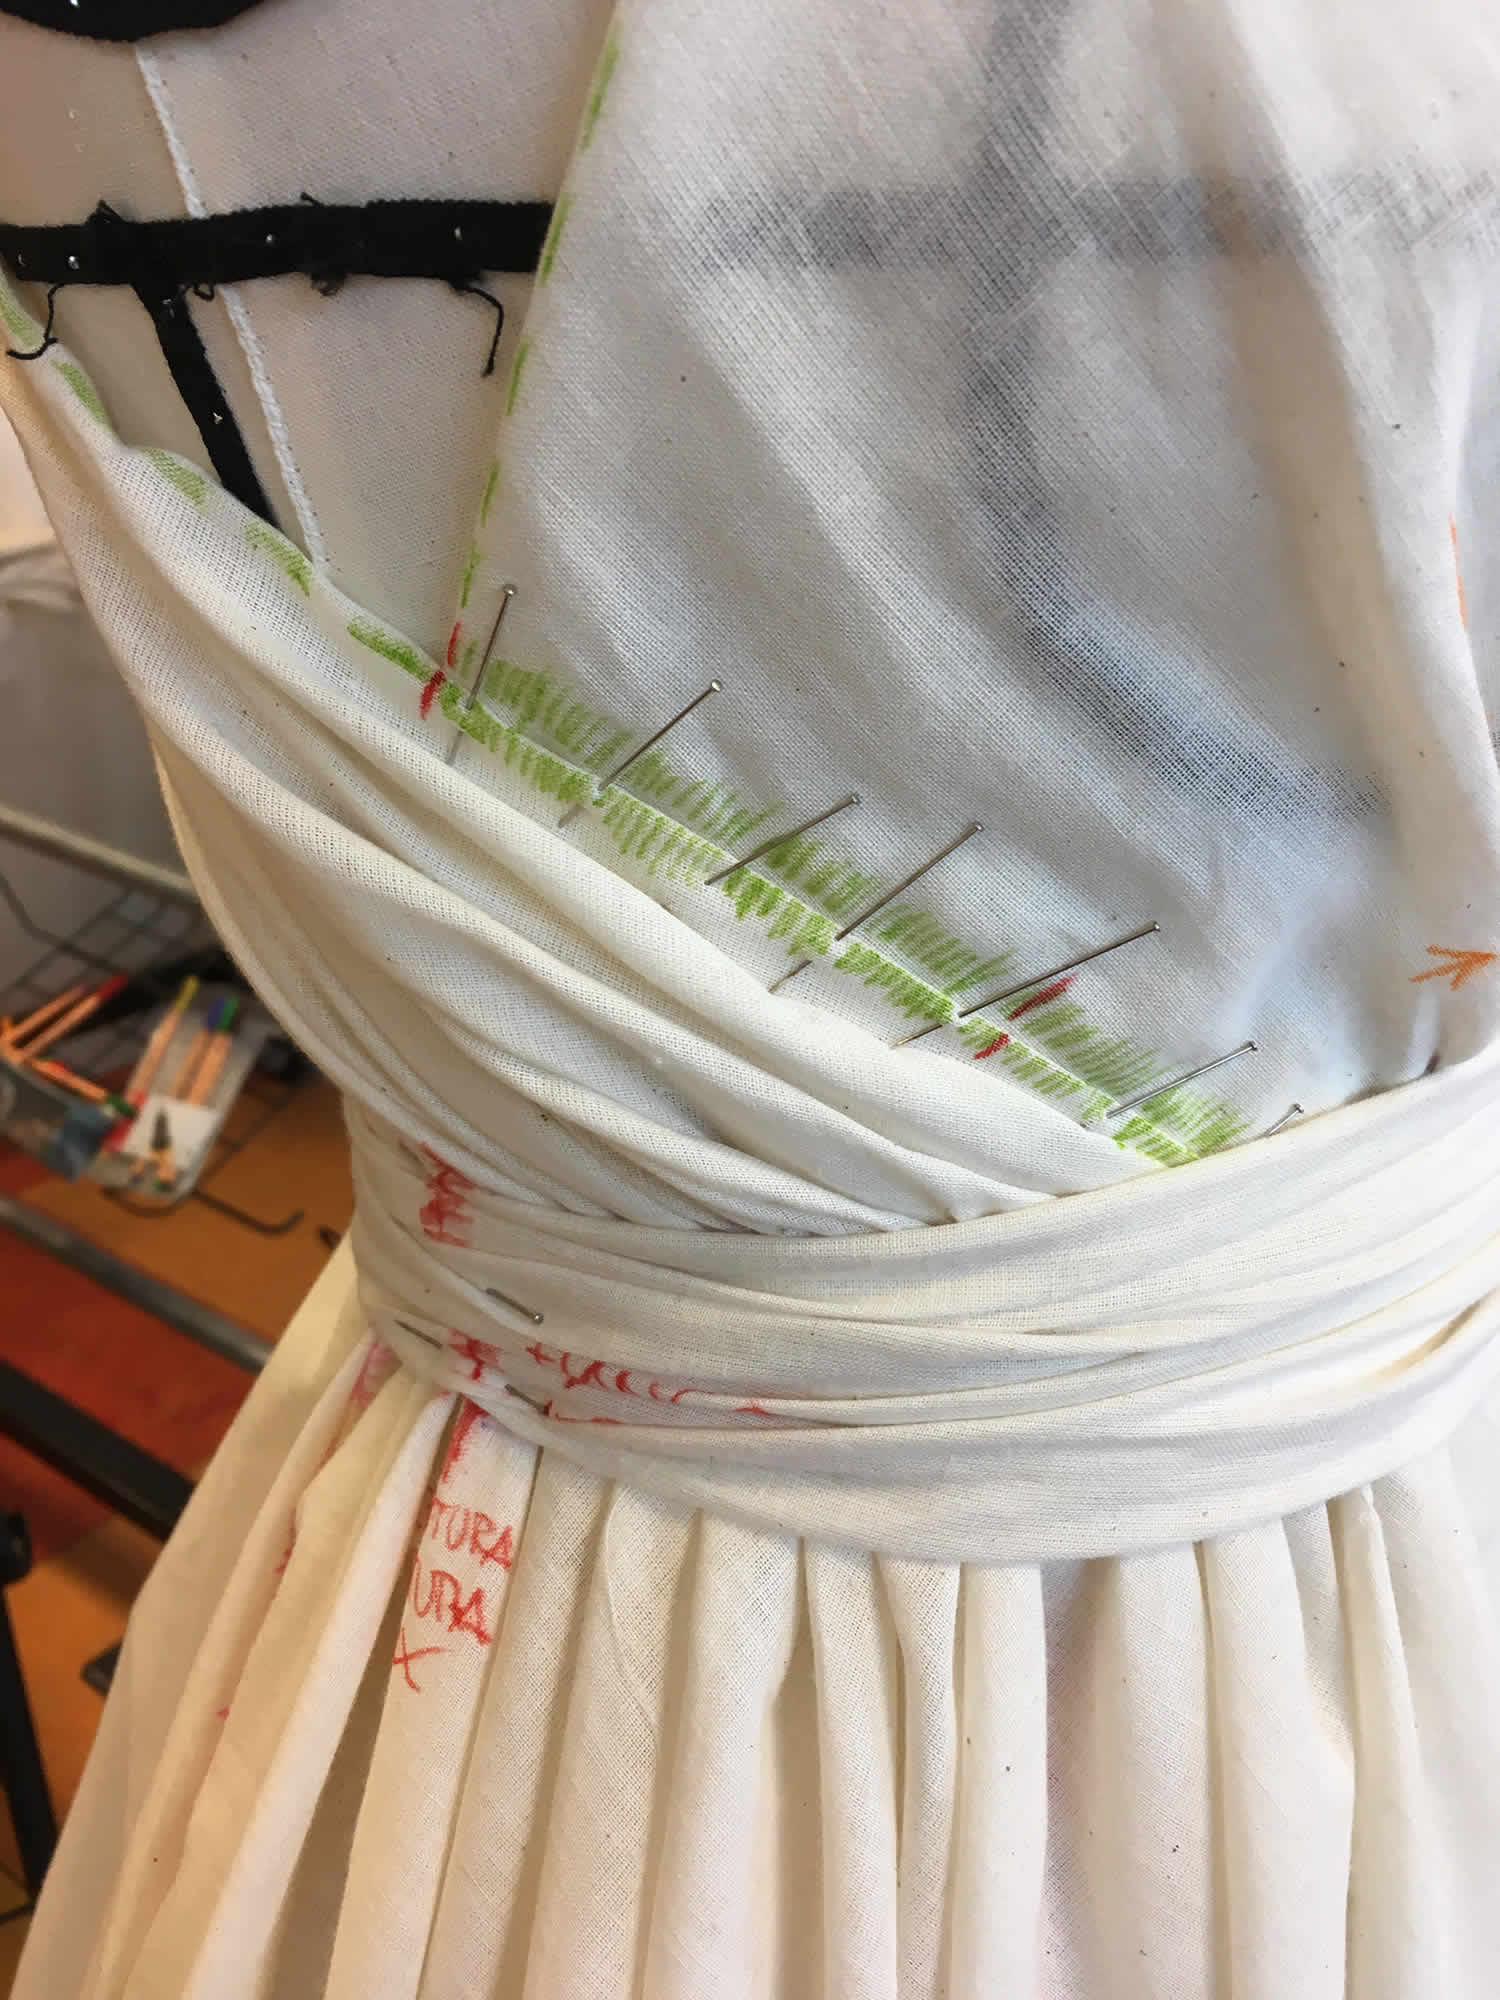
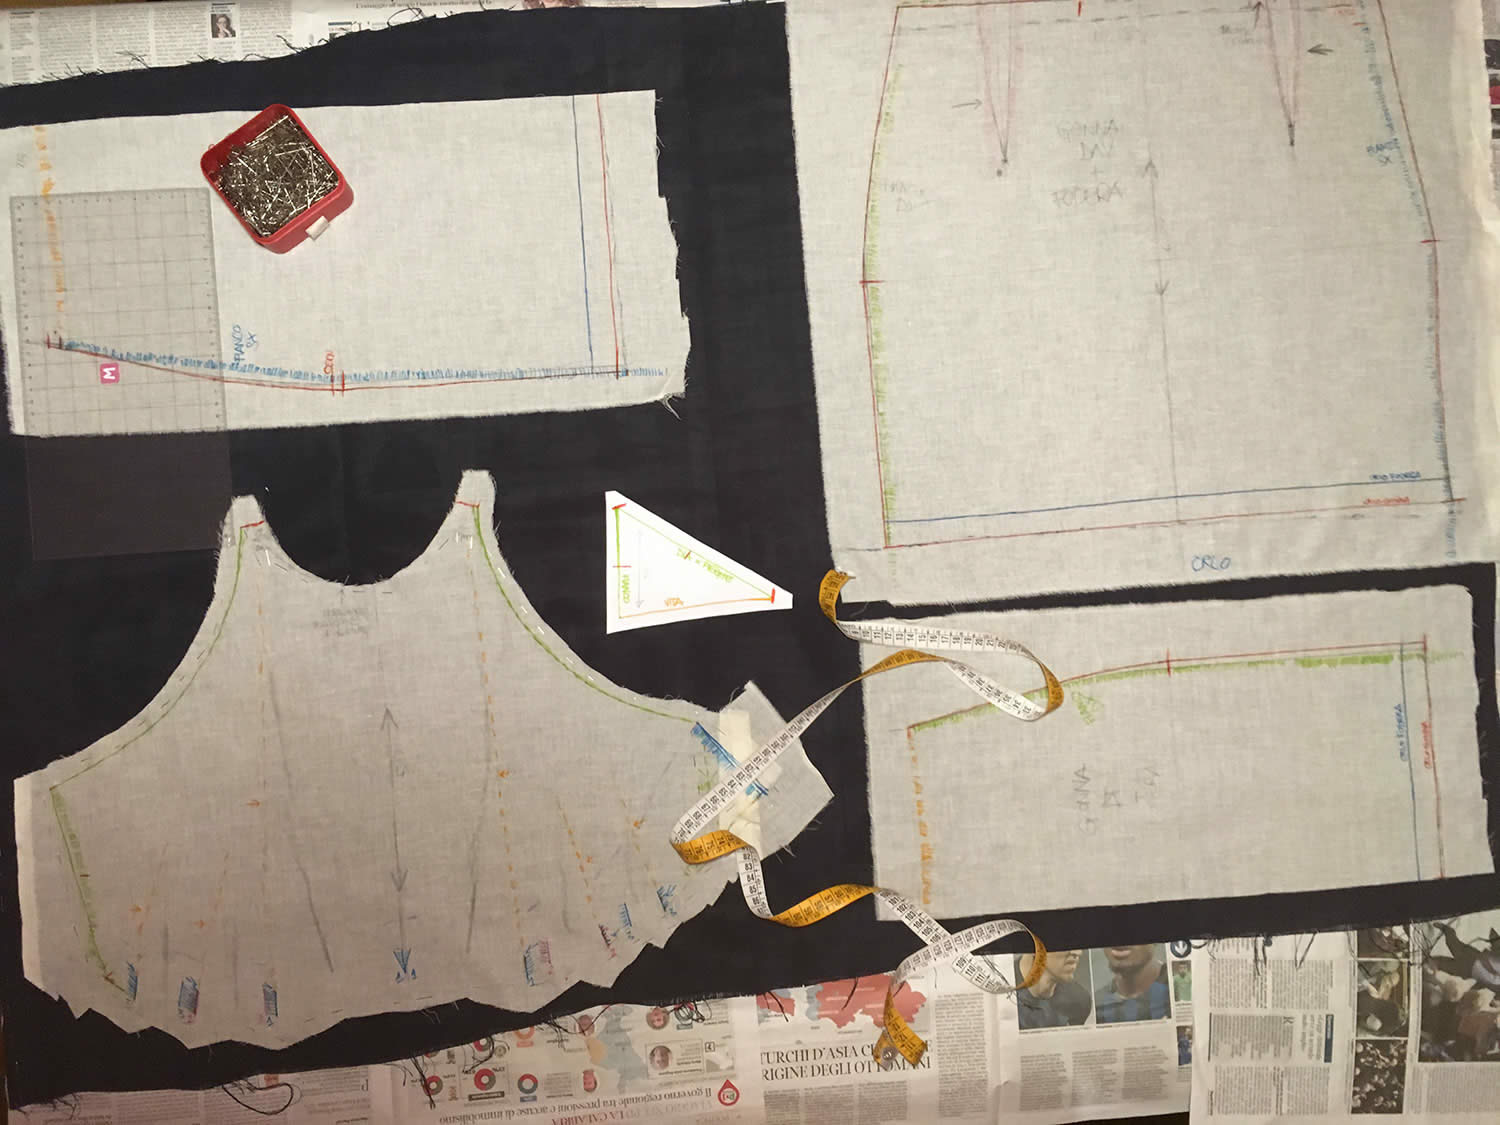
Here is the draping on the stand stage. As you can see I used a cotton cloth at the beginning. Then I turned the cotton cloth in a pattern to cut the silk fabrics (sorry for this not so high-quality picture, I took it at home late in the night).
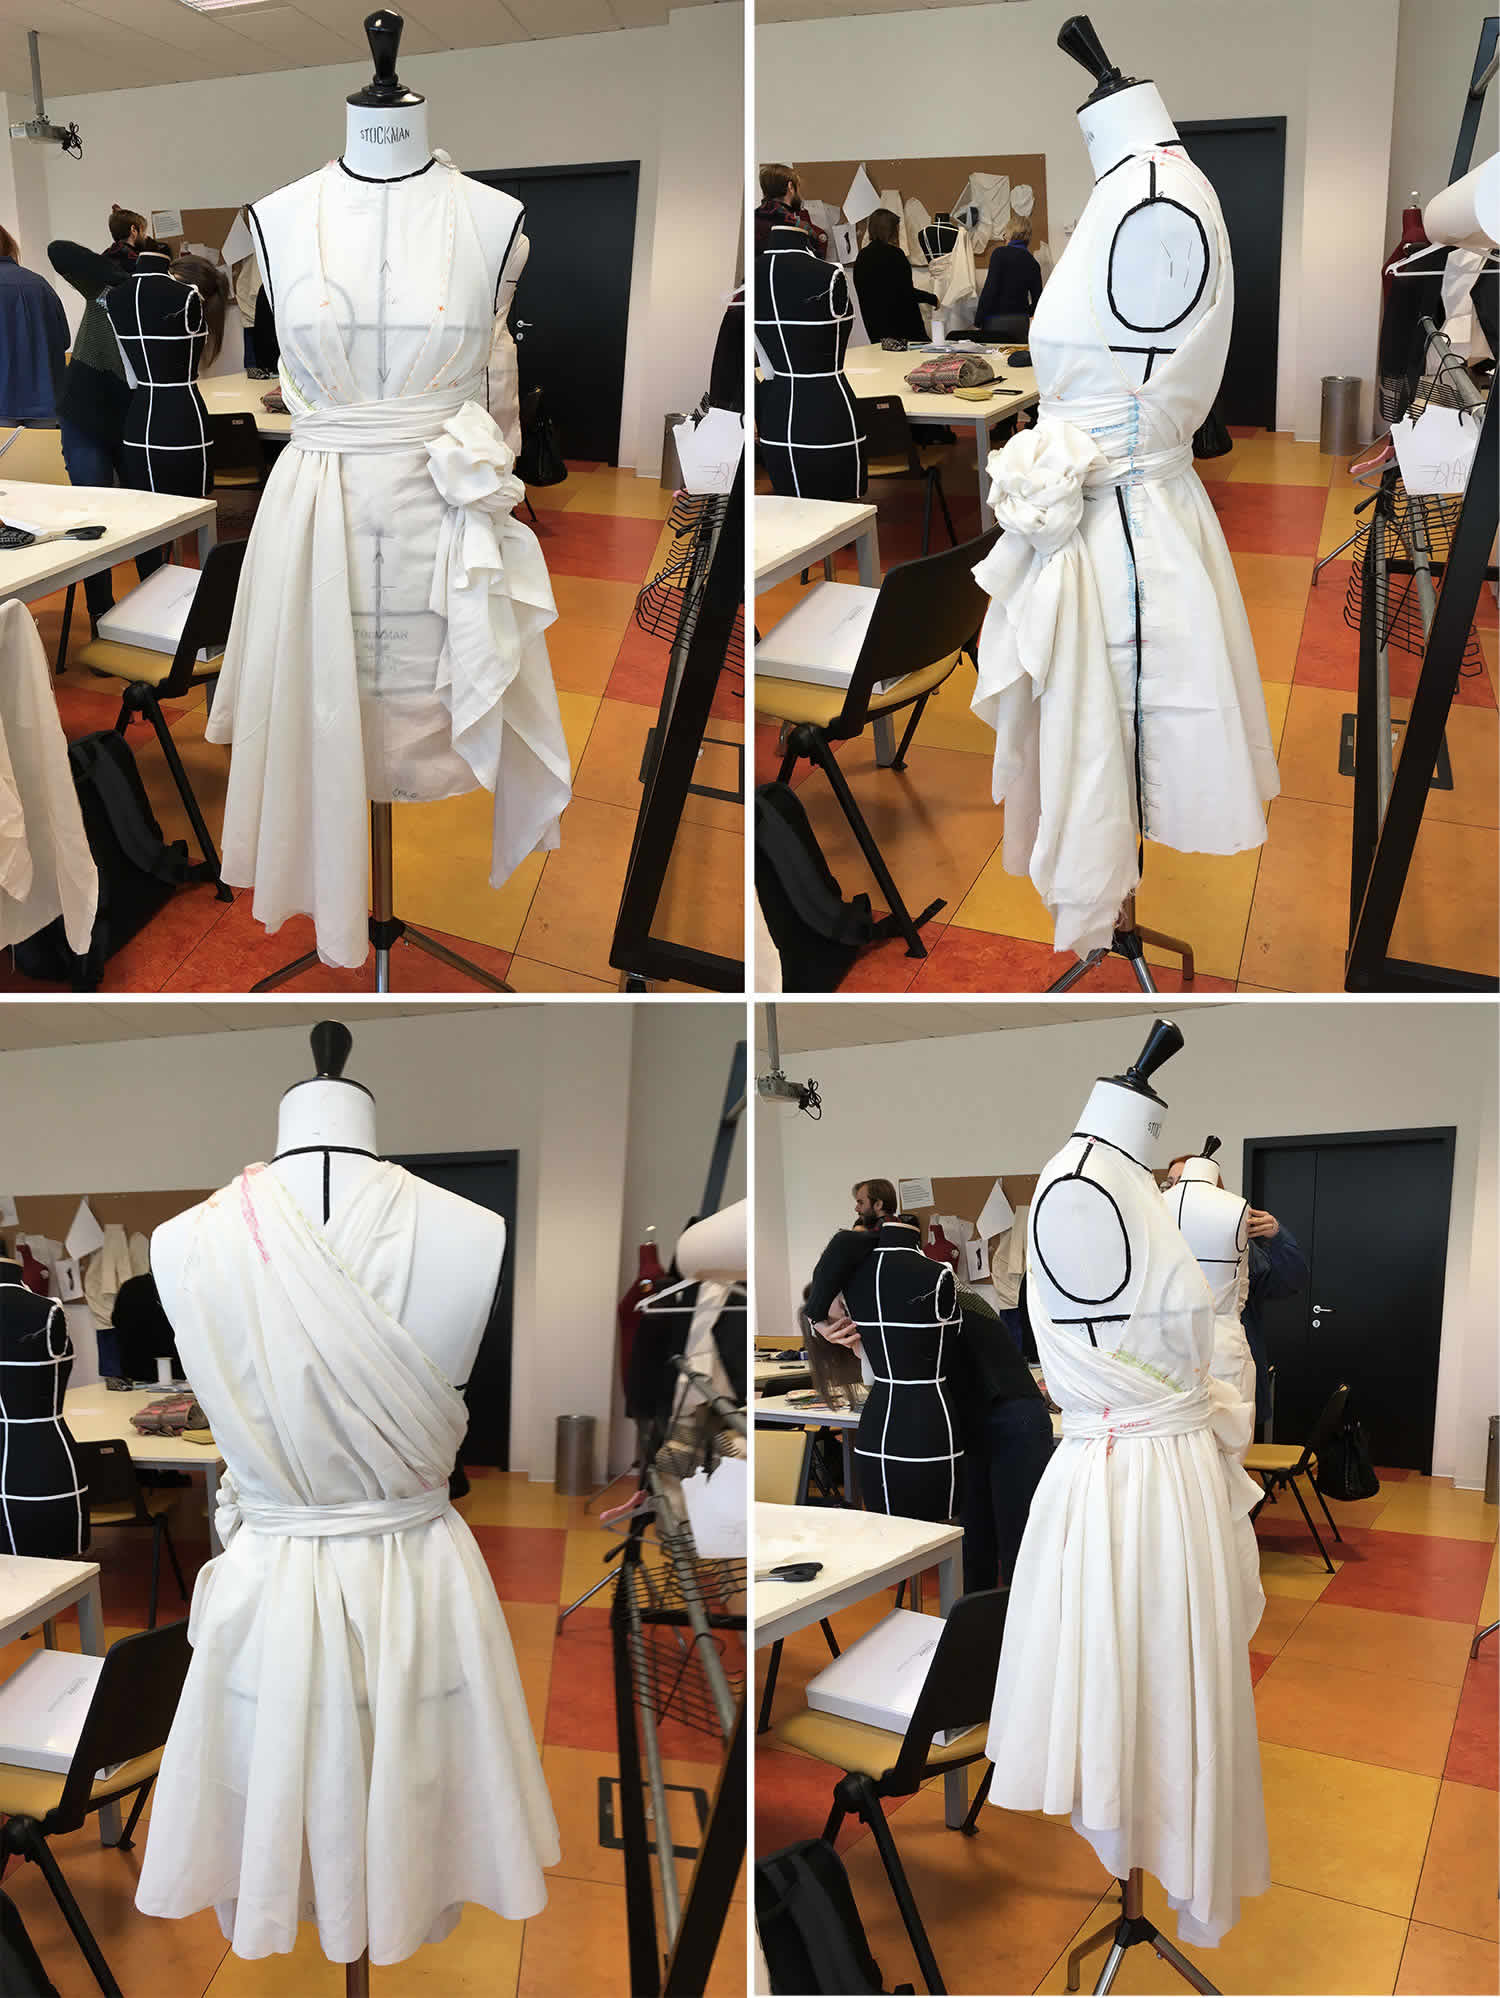
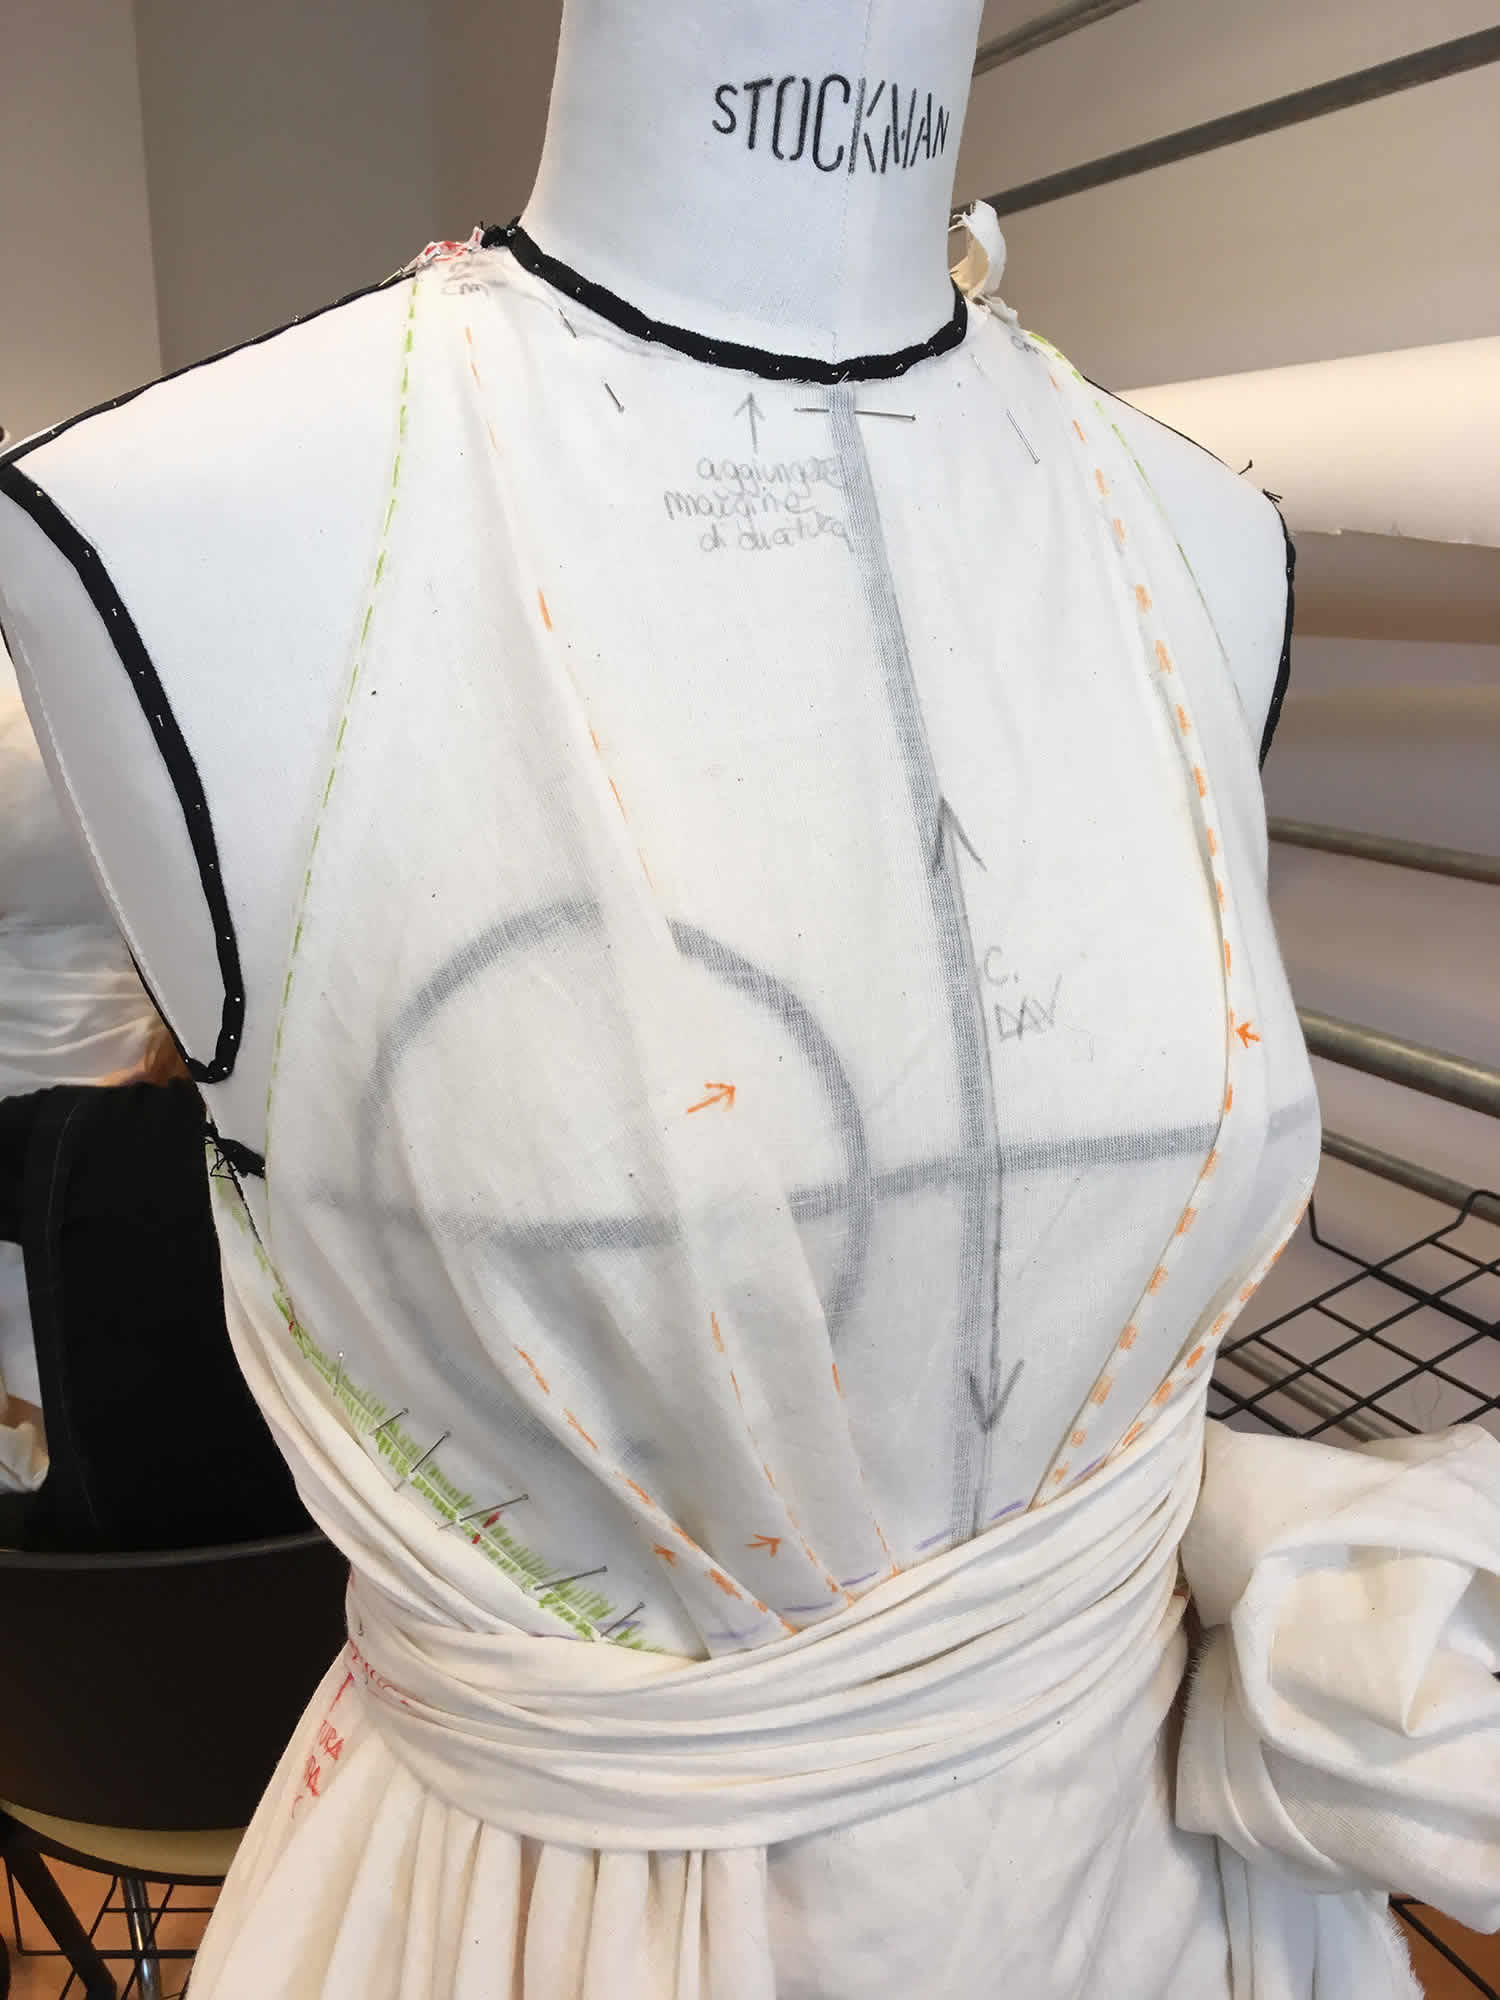
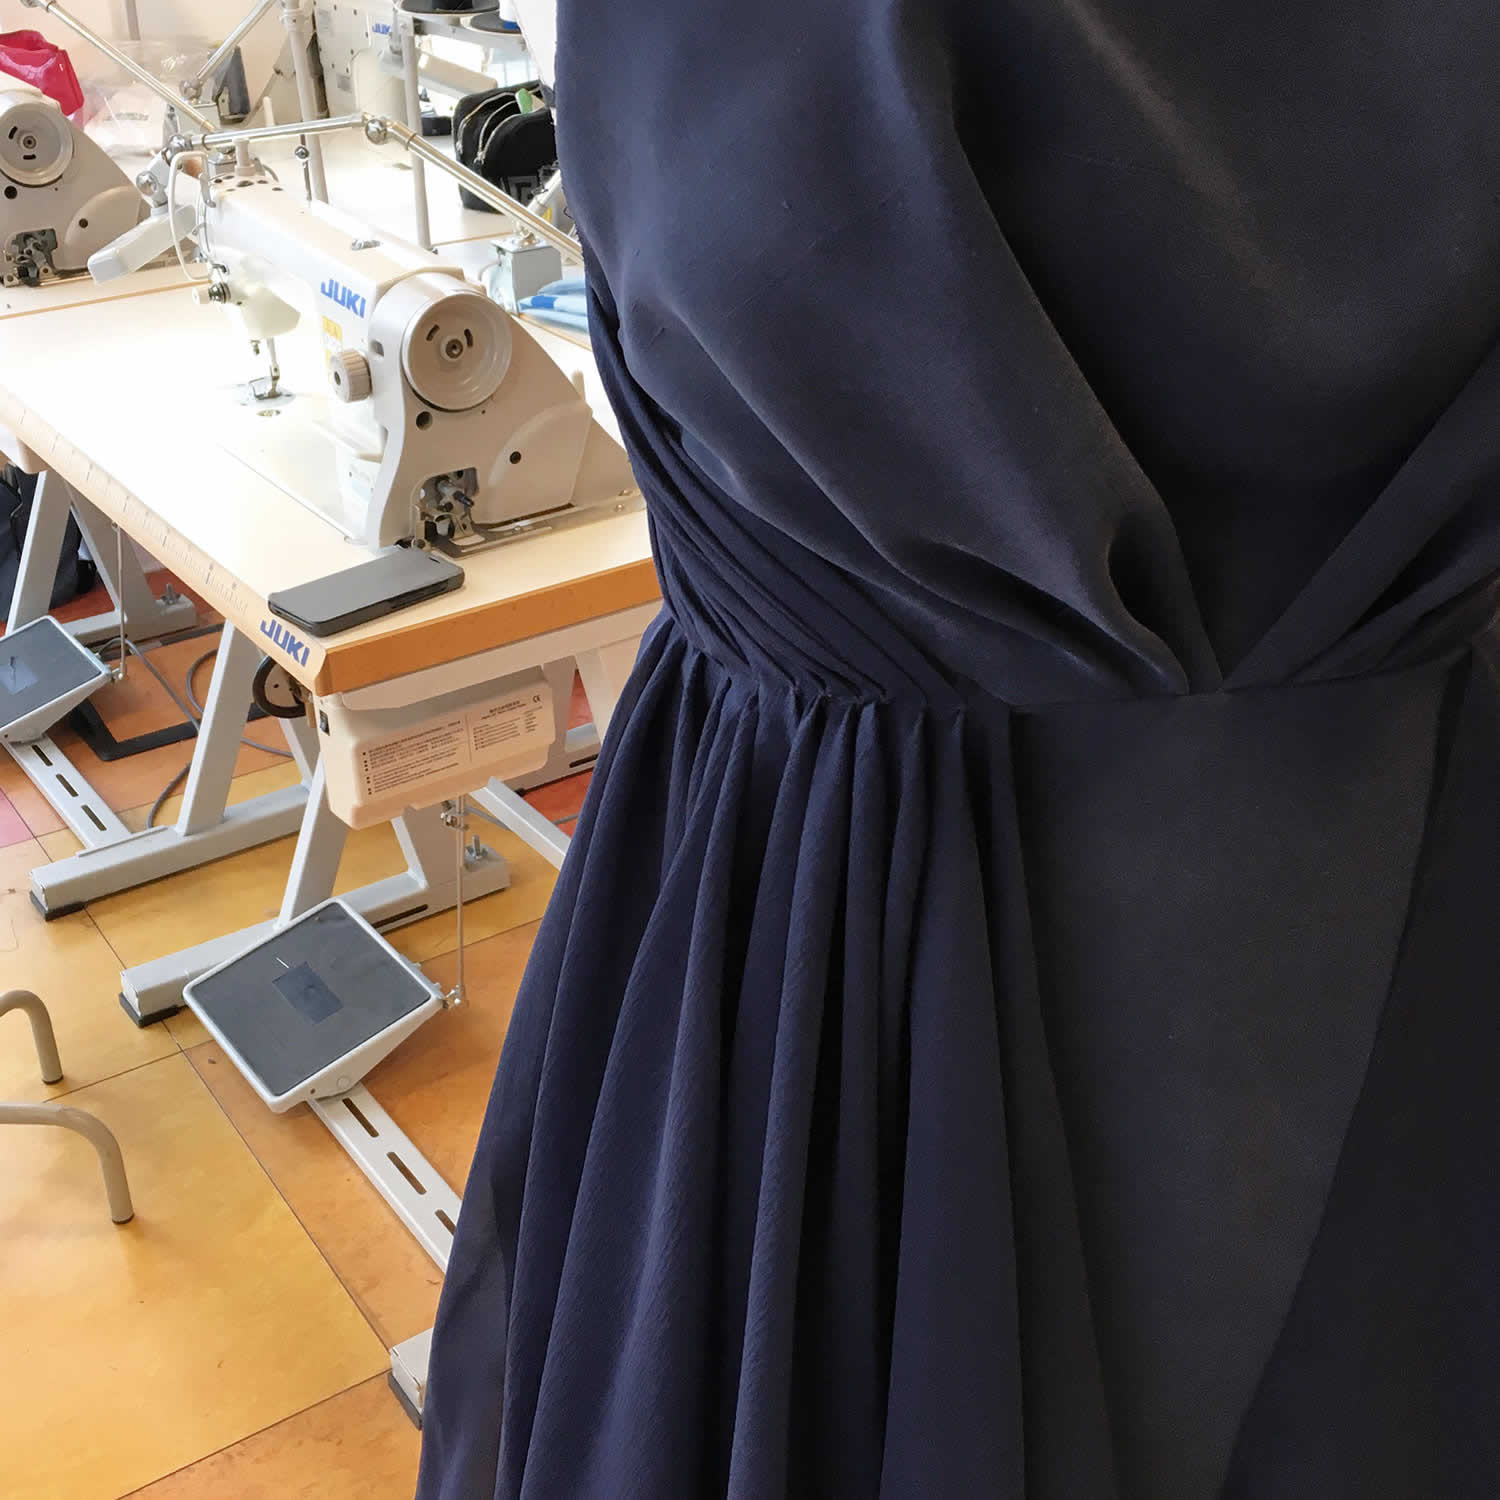
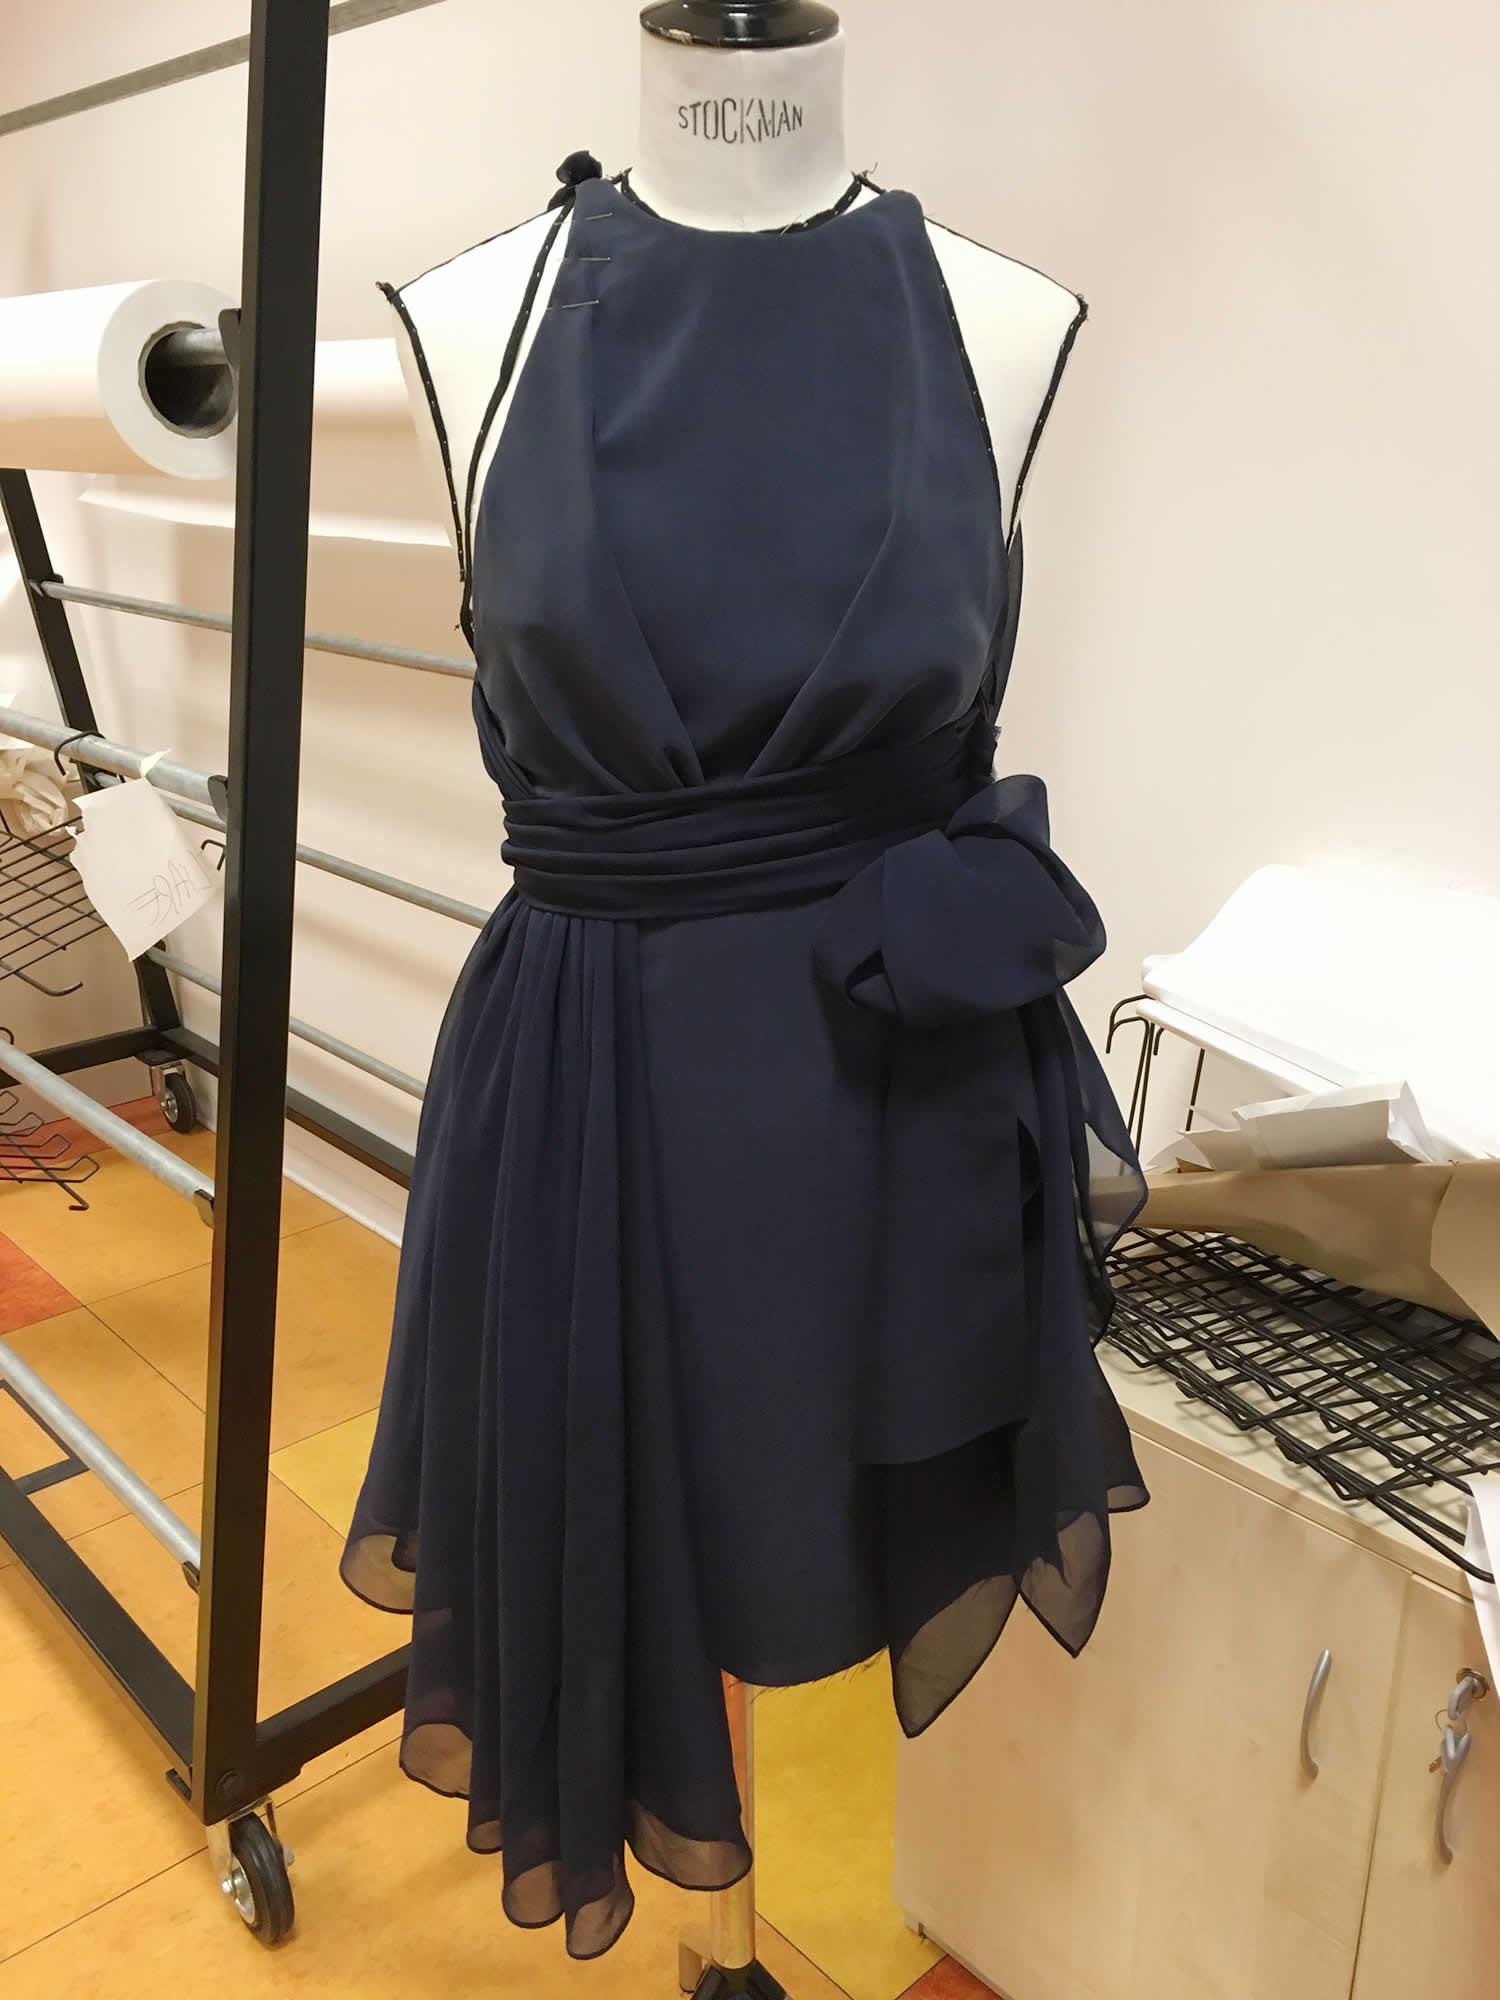
Here is the sewing stage instead:
If you are interested, here you can find the Danilo Attardi’s Draping on the stand course I have attended (the course is held in Italian), that is available as weekly/evening workshop at Afol Moda in Milan or in other fashion schools in Italy.
Have you ever try the Draping on the stand technique, even to just adapt or modify a garment? What do think about?


16 comments
Exquisite in every way!
Thank you Sarah!!
Fascinating to see it come together on the mannequin! Such a gorgeous design – the drape is just so lovely on you. It’s beautiful!
Thank you!! It was so much fun (plus a lot of patience! 🙂 ) making this dress. I’m gonna experiment with the draping on the stand technique soon again.
that is so beautiful, I hope you have an occasion to wear it soon. and thanks for showing the design process, very interesting.
Thank you! I’m happy you find the pictures of the process interesting! I hope to wear it soon too…maybe at a friend’s wedding!
Oh wow Martina, this dress is gorgeous! I love it!! I hope you find an occasion to wear this to, you look beautiful.
Thank you so much Juls! It’s my first super-special silk dress (I had never bought/made this kind of dress before)! I have to find an occasion to wear it soon! 🙂
This dress is stunning! I’ve always been curious about draping… nice to see your post about it!
Thank you! I find draping a very interesting technique. I’m gonna experiment with the draping on the stand technique soon again. I’ve come across this book (https://www.amazon.it/Draping-Complete-Course-Karolyn-Kiisel/dp/1780672861) online that I’d like to buy sooner or later to study this technique better. It seems interesting!
[…] Ladulsatina made a seriously gorgeous draped silk dress. […]
THAT DRESS IS AMAZING! I need one in every color!!
Wow, the end result is just stunning!
It’s amazing how just the muslin pattern looks so confusing and it start to make sense only when you see it pinned on the stand 🙂 It’s the other way around for me – first the pattern and then the muslin preparation. This way I would never achieve such a wild and free dress. Well done! Makes me wanna buy a stand like that and go wild with it 🙂
Thanks!! 🙂 I usually make first the pattern and then the muslin preparation too and that is more “technical”. So I’ve found this technique very interesting because you can create whatever you want just draping the fabric on the stand. The two techniques (drawing and draping) can work together nicely!
Martina, this is really a very gorgeous dress. Thanks for sharing the process, cant wait to sew it for myself. I will subscribe to your blog to get more posts like this in my inbox.
Thank you Hannah!! It was an amazing sewing project! I’ve learnt a lot making it and I love the result!